React and NodeJS Authentication with Refresh & Access Tokens: A Step-by-Step Guide
Mastering Token-Based Authentication in React and NodeJS

Web Developer. Tech Writer. Loves poetry, philosophy and programming. Writes at: https://medium.com/@sukhjinder and https://whatisweb.dev. Find me @ https://sukhjinderarora.com/
The most common way of performing authentication in Single Page Applications (SPA) is through the use of JSON Web Tokens (JWT). While JWT-based authentication is easy to implement, there are some downsides to using JWT in SPAs that should be considered:
Security: Since JWT is stateless and does not store any information on the server, there's no way to invalidate it from the server side. If a JWT is stolen or compromised, an attacker can gain access to sensitive information.
Lack of Revocation: As JWT is stateless, it makes it difficult to revoke tokens from the server side when a user logs out or changes their password, or to allow users to sign out from all devices.
Limited Validity Period: As JWT is valid for a limited amount of time, the users will have to log in to the application whenever the JWT expires, which is not a good user experience.
We can avoid these issues either by 1) Using Sessions, or 2) Using Refresh and Access tokens to authenticate users, which I will cover in this article.
Before getting started, let's first understand what refresh and access tokens are.
What are Access Tokens?
Access tokens are short-lived tokens that are issued by an authorization server and are used to access protected resources. Access tokens are passed in the header of an API request and are used to verify that the user has the necessary permissions to access the requested resource.
What are Refresh Tokens?
Refresh tokens are long-lived tokens that are issued along with access tokens. They are used to request a new access token when the current access token expires. This allows the user to remain authenticated even if the access token has expired, without having to re-enter their credentials.
Getting Started
Before starting, you must have npm installed on your computer, which comes bundled with Node.js which you can install from here.
Folder Structure:
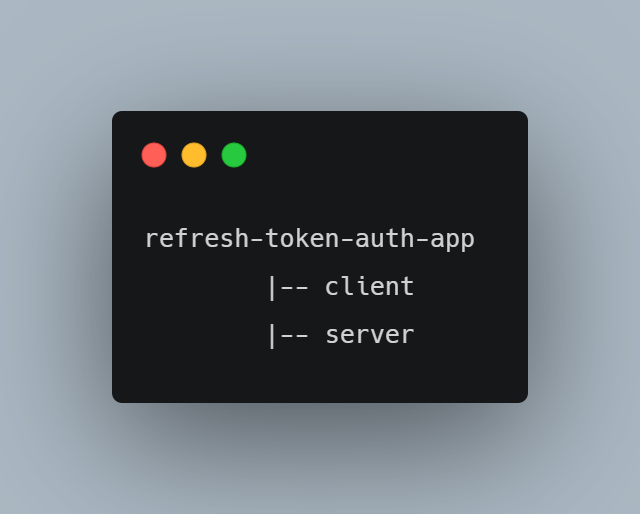
You can create the above directories with these commands.
mkdir refresh-token-auth-app
cd refresh-token-auth-app
mkdir client server
This project is divided into two parts:
Node.js & Express application for the backend.
ReactJS application for the front end.
Creating Backend Application:
Run the following commands to initialize the Node.js project and install the required dependencies.
cd refresh-token-auth-app/server
npm init -y
npm install express jsonwebtoken cookie-parser cors dotenv ms http-errors
Creating Frontend Application:
Run the following commands to initialize the React project.
cd refresh-token-auth-app
npx create-react-app client
Authentication Flow
Now that we have set up the project structure required for the application, let's understand the general overview of how the refresh and access token-based authentication will work in our application.
When a user first logs in to our application, the server will generate an access token and a refresh token for the user. The access token will be sent as a part of the response body, while the refresh token will be sent as an
httpOnlycookie. The refresh token will also be stored in the database for each user.When the access token is about to expire, our application will automatically send a request to the server to refresh the access token, also known as silent authentication. Since we are storing the access token in memory instead of local storage to prevent XSS attacks, our application will also perform silent authentication when the user refreshes the browser window.
When a user logs out of the application, the server will remove the refresh token stored in the database and the cookie.
API Endpoints
Now that we have a basic understanding of the authentication flow of our application, let's list the API endpoints necessary for the application to work.
We will need these endpoints to make our application work.
POST - /auth/sign-upto allow users to sign up.POST - /auth/loginto allow users to log in.POST - /auth/refreshto generate a new access token using the given refresh token.POST - /auth/logoutto log out the user.GET - /users/list(optional) to get the list of users.
Folder Structure
Before we start writing these APIs, let's create the folder structure required for the backend application.
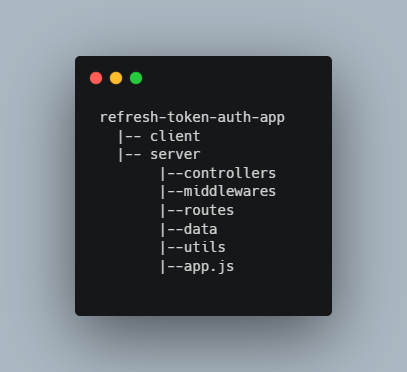
You can create the above directories with these commands.
cd server
mkdir controllers middlewares routes data utils
touch app.js
Creating Express Application
Add the following boilerplate code to the app.js file to create the express application.
const path = require('path');
require('dotenv').config();

const express = require('express');
const cors = require('cors');
const cookieParser = require('cookie-parser');

const { PORT, NODE_ENV } = process.env;

const isDev = NODE_ENV === 'development';

const app = express();

if (isDev) {
    app.use(
        cors({
            origin: 'http://localhost:3000',
            optionsSuccessStatus: 200,
            credentials: true,
        })
    );
}

app.use(express.json({ type: 'application/json' }));
app.use(cookieParser(process.env.COOKIE_SECRET));
app.use(express.static(path.join(__dirname, 'public')));

app.get('*', (req, res) => {
    res.sendFile(path.resolve(__dirname, 'public', 'index.html'));
});

app.use((req, res, next) => {
    const error = new Error('Not Found');
    error.status = 404;
    next(error);
});

app.use((error, req, res, next) => {
   console.error("\x1b[31m", error);
   if (res.headersSent) {
        return next(error);
    }
    return res.status(error.status || 500).json({
        error: {
            status: error.status || 500,
            message: error.status ? error.message : "Internal Server Error",
        },
    });
});

app.listen(PORT || 5000, (error) => {
    if (error) {
        console.log("Error in server setup");
        return;
    }
    console.log("Server listening on Port", PORT);
});
Here I am using:
dotenvmiddleware to load environment variables from the.envfile into theprocess.envvariable.corsmiddleware to allow Cross-Origin Resource Sharing (CORS) in development mode.express.jsonto parse the request body as JSON.cookie-parsermiddleware to parse cookies in the incoming request headers.express.staticmiddleware to serve the static files from thepublicdirectory.Error handler middleware — which is executed when an error occurs in the application.
And Finally
app.listenmethod to create a new server and listen on the specified port defined by thePORTenvironment variable.
Add this code to the package.json script section:
"start": "node app.js"
Environment variables
Create a .env file at the root of the server directory and add the following environment variables to that file.
PORT=5000

ACCESS_TOKEN_SECRET=7rG7v5ElkhMpIHdQfs5l4sC+zprSYD2DNII4fzRusLevT2n0fEvpFzd6Ei2GpXzwEkghDxWxONRx0eCvcrsziY6EuF6GutZX+niTT6QJylTba/ydgURY9+7k1rn8w7sfiCAQPBg7c/SlY/nMRsDF4/5MSQATlfuSXX+9BIKgDmFWwZA19QqGS4cWKNiQO7JEhcNjkpy0FtaeUzK1/q0pG5Rjq8V8L8zbyhttUbAWd3h8N+m5vV7gi22HBrLlqpbFL0IIeb3GHWEe9z1nymyQNjLdxO6kcNRBNmWR7nRbamje6TJ6aHChebONL5h3GRWAFLwS188L41iNp67EqcNSqg==

REFRESH_TOKEN_SECRET=LbIiOVV6MuKQ7A2KnGi6uW6vxrypJrouog48VY4bJjrJJdBbq0XLuKBU4Ia/Pzphvk4j6iUa7EEFnpgCBRewvxPCIyHZpHrGRZjUtCmbjGpLqIe5tlgMlEOPTzrwYAkgAHBNN6UzeZl55wlzOSiCWbhqcw2V6qDy8KYh+llIm/eBUVVlThNw7TDsn0LtcLBjhkzaBQqCUzZQmOLtTpCerjnzaWzlS2vSyP96zJ/yemlkgF21EZkiKPdoNrJPeaXNk4kqECHNlZ4mccpCTSWPr+RPR/vjGltCRL6nhJ1w6MqBDYFpXcAHcv54fz1bXcEwkhEO5imzoKa6aMg/1LPpTw==

COOKIE_SECRET=Ak1jjwP38UQ3TUPatxFva2tytaYx0HnKxkfytoQAoignerppxxg7ogh2tUxnKhSe0JXVL7kbAZsHcnCFE3hY3OI2nuydrR9JL/xrj30EFBSQNjQ7FK8rY8S0QES/5z28k+etbBd9u7ms/bo/+YuA2ueJ2MiFCeRNH7UGknueF3JHEa+sfSVsf3QLIBgXd2WwmemRNYeqtpRmdxY29t8HeDwJqtoY9WdLU2onahQCzyuzD2/5aJWwwSIGyL7VeHSg7BQ/DDK+s2tv/IP6LVr3kVGMwhOGJksh6N5Ndeh9p22BkxsN4Nw1jzlxRGN4OhNmLdiPkFsAzj2B739z87mwNQ==

ACCESS_TOKEN_LIFE=15m

REFRESH_TOKEN_LIFE=30d
You can generate these secret keys in NodeJS console / REPL (Read Evaluate Print Loop) using:
require('crypto').randomBytes(256).toString('base64');
Because the access token is meant to be short-lived, It has been set to expire after 15 minutes. The refresh token is meant to remain valid for a longer duration, so its expiration time has been set to 30 days.
Adding Dummy Data
For the sake of simplicity, I am not using any database in this article, so let's create a new data.js file inside the data folder. This file contains the dummy data required for the application to function.
// data.js
const users = [
    {
        id: 1,
        name: "John Doe",
        email: "johndoe@example.com",
        userName: "johndoe",
        password: "JohnDoe@123"
    },
    {
        id: 2,
        name: "Jane Smith",
        email: "janesmith@example.com",
        userName: "janesmith",
        password: "JaneSmith@123"
    },
];

const tokens = [];  // [{userId: number, refreshToken: string, expirationTime: number }]

module.exports = { users, tokens };
Here, the users array is used to store the application's users and the tokens array is used to store the users' refresh tokens along with their user ID and the token's expiration time.
Note:— I am storing the passwords as plain text, but you should not store them as plain text for real-world applications.
Adding Routes, Controllers and Middlewares
Adding Auth Routes
Add this code to the auth.js file inside the routes folder.
const router = require('express').Router();

const authController = require('../controllers/auth');
const authMiddleware = require('../middlewares/auth');

router.post(
    '/sign-up',
    authController.signUp,
    authMiddleware.generateAuthTokens
);

router.post(
    '/login',
    authController.login,
    authMiddleware.generateAuthTokens
);

router.post(
    '/logout',
    authMiddleware.isAuthenticated,
    authController.logout
);

router.post(
    '/refresh',
    authController.refreshAccessToken
);

module.exports = router;
POST /auth/sign-up: This endpoint handles the sign-up requests. It uses theauthController.signUpmethod to create a new user account, and then uses theauthMiddleware.generateAuthTokensmiddleware to generate authentication tokens for the user.POST /auth/login: This endpoint handles the login requests. It uses theauthController.loginmethod to authenticate the user, and then uses theauthMiddleware.generateAuthTokensmiddleware to generate authentication tokens for the user.POST /auth/logout: This endpoint handles user logout requests. It uses theauthMiddleware.isAuthenticatedmiddleware to check if the user is authenticated, and then uses theauthController.logoutmethod to log out the user.POST /auth/refresh: This endpoint is used to refresh the access token. When the access token expires, the client can use this endpoint to obtain a new access token by sending a valid refresh token in the request body. TheauthController.refreshAccessTokenfunction is called to handle this request and generate a new access token.
Adding Users Routes
Add this code to the users.js file inside the routes folder.
const router = require('express').Router();

const { isAuthenticated } = require('../middlewares/auth');

const usersController = require('../controllers/users');

router.get('/list', isAuthenticated, usersController.getUsersList);

router.get('/me', isAuthenticated, usersController.getAuthenticatedUser);

router.get('/:id', isAuthenticated, usersController.getUserById);

module.exports = router;
GET /users/list: This endpoint is used to retrieve the list of users. It uses theauthMiddleware.isAuthenticatedmiddleware to check if the user is authenticated, and then uses theusersController.getUsersListmethod to get the list of users.GET /users/me: This endpoint is used to retrieve the authenticated user's information. It uses theauthMiddleware.isAuthenticatedmiddleware to check if the user is authenticated, and then uses theusersController.getAuthenticatedUsermethod to get the authenticated user.GET /users/:id: This endpoint is used to retrieve a user's information by ID. It uses theauthMiddleware.isAuthenticatedmiddleware to check if the user is authenticated, and then uses theusersController.getUserByIdmethod to get the user by their ID. The user's ID is specified in the URL path using a route parameter (:id).
Updating app.js:
Add this code inside app.js to add the auth and users routes.
/**
 * Existing Code
 */
const path = require('path');
require('dotenv').config();

const express = require('express');
const cors = require('cors');
const cookieParser = require('cookie-parser');

/**
 * New Code
 */
const authRoutes = require('./routes/auth');
const usersRoutes = require('./routes/users');

/**
 * Existing Code
 */
const { PORT, NODE_ENV } = process.env;

const isDev = NODE_ENV === 'development';

const app = express();

if (isDev) {
    app.use(
        cors({
            origin: 'http://localhost:3000',
            optionsSuccessStatus: 200,
            credentials: true,
        })
    );
}

app.use(express.json({ type: 'application/json' }));
app.use(cookieParser(process.env.COOKIE_SECRET));
app.use(express.static(path.join(__dirname, 'public')));

/**
 * New Code
 */
app.use('/api/auth', authRoutes);
app.use('/api/users', usersRoutes);
Adding Auth Controllers
Add this code to the auth.js file inside the controllers folder.
Sign-up Controller
const createError = require('http-errors');

const { users } = require('../data/data');

const signUp = async (req, res, next) => {
    const { name, username, email, password } = req.body;

    if(!name || !username || !email || !password) {
        return res.status(422).json({
            error: 'Please fill all the required fields'
        });
    }

    try {
        const userAlreadyExists = users.find(user => {
            if (user.userName === username || user.email === email) {
                return true;
            }
            return false;
        });

        if (userAlreadyExists) {
            return res.status(422).json({
                error: 'Username or email already exists'
            });
        }

        const newUser = {
            id: users[users.length - 1].id + 1,
            name: name,
            userName: username,
            email: email,
            password: password
        };

        users.push(newUser);

        req.userId = newUser.id;
        return next();
    } catch (error) {
        return next(error);
    }
};

module.exports = {
    signUp
}
The signUp function is responsible for handling the sign-up process. It requires the user's name, username, email, and password to be sent in the request body. It then checks if all the required fields are present, and if not, it returns a response with a 422 status code and an error message.
Next, it checks if a user with the same username or email already exists in the users array. If it does, it returns a response with a 422 status code and an error message indicating that the username or email already exists.
If the user does not already exist, the function creates a new user object with the required fields, assigns it a unique id, and pushes it to the users array.
The function then sets the userId property of the req object to the newly created user's id and calls the next function to pass control to the next middleware to generate the authentication tokens for the user.
If any error occurs during the execution of the function, it calls the next function with the error to pass control to the error-handling middleware.
Login Controller
const createError = require('http-errors');

const { users } = require('../data/data');

const signUp = async (req, res, next) => { .... };

const login = async (req, res, next) => {
    const { username, password } = req.body;

    try {
        if (!username || !password) {
            return res.status(422).json({
                error: 'Please fill all the required fields'
            });
        }

        const user = users.find(user => {
            if (user.userName === username || user.email === username) {
                return true;
            }
            return false;
        });

        if (!user) {
            const error = createError.Unauthorized('Invalid username or password');
            throw error;
        }

        const passwordsMatch = user.password == password;

        if (!passwordsMatch) {
            const error = createError.Unauthorized('Invalid username or password');
            throw error;
        }

        req.userId = user.id;
        return next();
    } catch (error) {
        return next(error);
    }
};

module.exports = {
    signUp,
    login
}
The login function is responsible for handling the log-in process. It requires the user's username and password to be sent in the request body. If either of these fields is missing, it sends an error response back to the client indicating that both fields are required.
Next, the function searches for a user in the users array by checking if either the userName or email of the user matches the provided username. If a matching user is found, the function checks if the provided password matches the user's password.
If the provided password does not match, the function sends an error response indicating that the username or password is invalid. If the provided password matches, the function then sets the userId property of the req object to the authenticated user's id and calls the next function to pass control to the next middleware to generate the authentication tokens for the user.
If any error occurs during the execution of the function, it calls the next function with the error to pass control to the error-handling middleware.
Logout Controller
const jwt = require('jsonwebtoken');
const createError = require("http-errors");
const ms = require('ms');

const { clearTokens, generateJWT } = require("../utils/auth");
const { users, tokens } = require("../data/data");

const signUp = async (req, res, next) => { .... };

const login = async (req, res, next) => { .... };

const logout = async (req, res, next) => {
  await clearTokens(req, res, next);
  return res.sendStatus(204);
};

module.exports = {
    signUp,
    login,
    logout
};
The logout function is responsible for logging out the user. It does so by calling the clearTokens function to remove the user's refresh token from the server as well as from the user's cookie.
Once the clearTokens function has finished its execution, the logout function sends the response with the HTTP status code of 204 (which means "No Content") back to the client.
Refresh Access Token Controller
const jwt = require('jsonwebtoken');
const createError = require("http-errors");
const ms = require('ms');

const { clearTokens, generateJWT } = require("../utils/auth");
const { users, tokens } = require("../data/data");

const signUp = async (req, res, next) => { .... };

const login = async (req, res, next) => { .... };

const logout = async (req, res, next) => { .... };

const refreshAccessToken = async (req, res, next) => {
  const { REFRESH_TOKEN_SECRET, ACCESS_TOKEN_SECRET, ACCESS_TOKEN_LIFE } = process.env;

  const { signedCookies } = req;
  const { refreshToken } = signedCookies;
  if (!refreshToken) {
    return res.sendStatus(204);
  }
  try {
    const refreshTokenInDB = tokens.find(token => token.refreshToken == refreshToken)?.refreshToken;

    if (!refreshTokenInDB) {
      await clearTokens(req, res, next);
      const error = createError.Unauthorized();
      throw error;
    }

    try {
      const decodedToken = jwt.verify(refreshToken, REFRESH_TOKEN_SECRET);
      const { userId } = decodedToken;
      const user = users.find(user => user.id == userId);

      if (!user) {
        await clearTokens(req, res);
        const error = createError("Invalid credentials", 401);
        throw error;
      }

      const accessToken = generateJWT(
        user.id,
        ACCESS_TOKEN_SECRET,
        ACCESS_TOKEN_LIFE
      );
      return res.status(200).json({
        user,
        accessToken,
        expiresAt: new Date(Date.now() + ms(ACCESS_TOKEN_LIFE)),
      });
    } catch (error) {
      return next(error);
    }
  } catch (error) {
    return next(error);
  }
};

module.exports = {
    signUp,
    login,
    logout,
    refreshAccessToken
};
This refreshAccessToken function is responsible for refreshing the access token of a user. The function first checks for a refresh token in the signed cookies of the request. If a refresh token is found, it checks if the token is valid by comparing it with the tokens stored in the tokens array.
If the token is invalid, it clears all tokens and throws an error with a 401 status code. If the token is valid, it decodes the refresh token to get the user ID, checks if the user is valid, generates a new access token, and returns it along with the user information and the expiration time. If there is an error in the process, the function passes the error to the next error-handling middleware function.
Adding Users Controllers
Add this code to the users.js file inside the controllers folder.
const createError = require('http-errors');

const { users } = require('../data/data');

const getUsersList = async (req, res, next) => {
    const usersListWithOutPassword = users.map(user => {
        const {password, ...userWithOutPassword} = user;
        return {...userWithOutPassword};
    });

    return res.status(200).json({
        data: usersListWithOutPassword
    })
};

const getAuthenticatedUser = async (req, res, next) => {
    try {
        const { userId } = req;

        const authenticatedUser = users.find(user => user.id == userId);

        if(authenticatedUser) {
            return res.status(200).json({
                data: authenticatedUser
            })
        }

        const error = createError.NotFound();
        throw error;

    } catch(error) {
        return next(error);
    }

};

const getUserById = async (req, res, next) => {
    try {
        const { id } = req.params;

        const user = users.find(user => user.id == id);

        if (user) {
            return res.status(200).json({
                data: user
            })
        }

        const error = createError.NotFound();
        throw error;
    } catch(error) {
        return next(error);
    }
};

module.exports = {
    getUsersList,
    getAuthenticatedUser,
    getUserById
}
getUsersList: This function returns a list of all users.getAuthenticatedUser: This function returns the currently authenticated user based on theiruserId.getUserById: This function returns a user by their ID.
Adding Auth Middlewares
Add this code to the auth.js file inside the middlewares folder.
generateAuthTokens middleware
This middleware is used to generate access and refresh tokens once a user successfully signs up or logs into our application.
const jwt = require('jsonwebtoken');
const createError = require('http-errors');
const ms = require('ms');
const { generateJWT } = require('../utils/auth');
const { ACCESS_TOKEN_LIFE, REFRESH_TOKEN_LIFE, ACCESS_TOKEN_SECRET, REFRESH_TOKEN_SECRET, NODE_ENV } = process.env;
const dev = NODE_ENV === 'development';
const { users, tokens } = require('../data/data');
const generateAuthTokens = async (req, res, next) => {
try {
const user = users.find(user => user.id === req.userId);
const refreshToken = generateJWT(
req.userId,
REFRESH_TOKEN_SECRET,
REFRESH_TOKEN_LIFE
);
const accessToken = generateJWT(
req.userId,
ACCESS_TOKEN_SECRET,
ACCESS_TOKEN_LIFE
);
const token = {
refreshToken,
userId: req.userId,
expirationTime: new Date(Date.now() + ms(REFRESH_TOKEN_LIFE)).getTime(),
};
tokens.push(token);
res.cookie("refreshToken", refreshToken, {
httpOnly: true,
secure: !dev,
signed: true,
expires: new Date(Date.now() + ms(REFRESH_TOKEN_LIFE)),
});
const expiresAt = new Date(Date.now() + ms(ACCESS_TOKEN_LIFE));
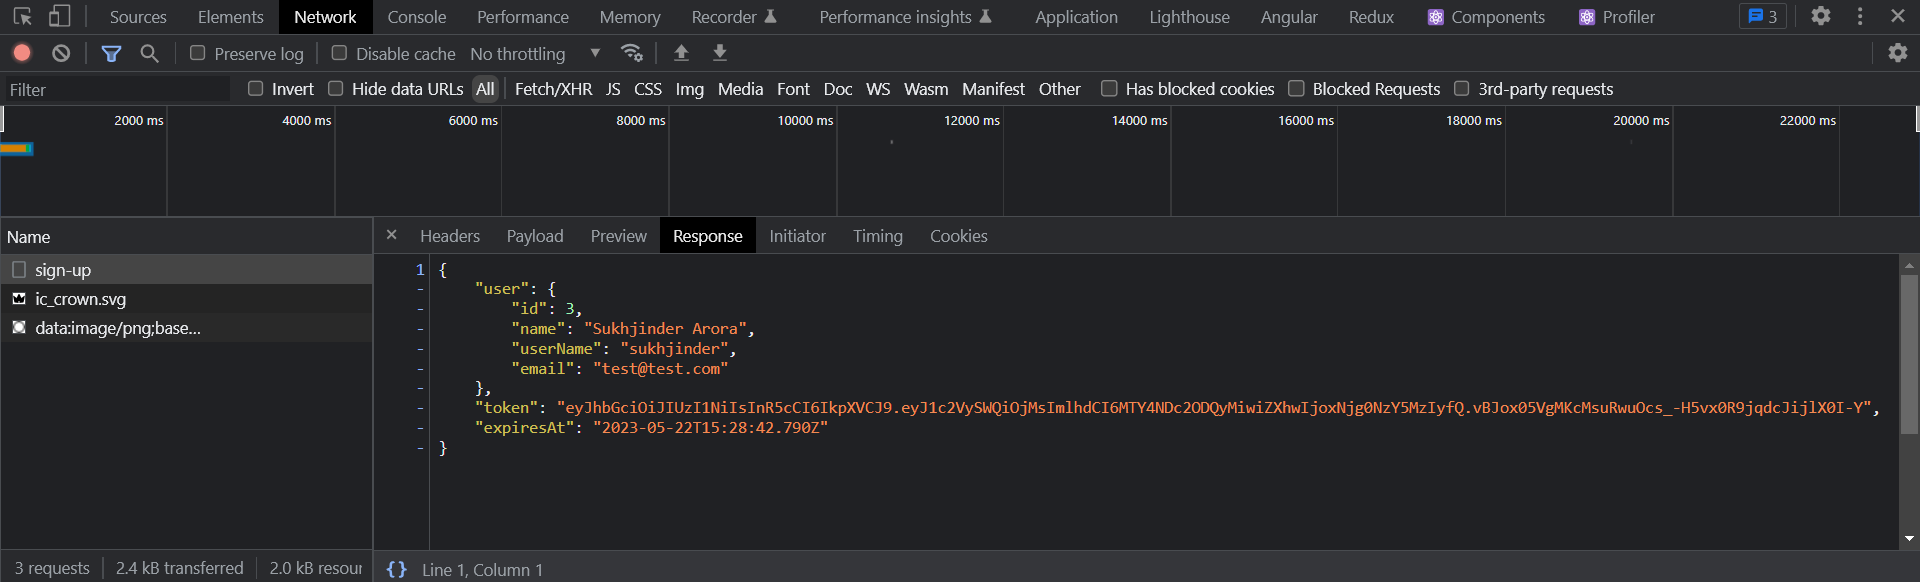
return res.status(200).json({
user,
token: accessToken,
expiresAt,
});
} catch (error) {
return next(error);
}
};
module.exports = {
generateAuthTokens
}
The refresh and access tokens are generated by calling the generateJWT function with the authenticated user's ID, token secret, and the token expiration time.
Here I am sending the access token as part of the response body along with its expiration time and the authenticated user's object, and sending the refresh token as an httpOnly cookie. I am also saving the refresh token in the database (tokens array here) to invalidate the user's session from the backend.
Note:— I am sending the refresh token as an httpOnly cookie to prevent it from being read using JavaScript, and setting the secure attribute to false in development mode and true in production to only send cookies using HTTPS in production.
isAuthenticated Middleware
This middleware is used to check if the user is authenticated to access the protected routes.
const jwt = require('jsonwebtoken');
const createError = require('http-errors');
const ms = require('ms');

const { generateJWT } = require('../utils/auth');

const { ACCESS_TOKEN_LIFE, REFRESH_TOKEN_LIFE, ACCESS_TOKEN_SECRET, REFRESH_TOKEN_SECRET, NODE_ENV } = process.env;

const dev = NODE_ENV === 'development';

const { users, tokens } = require('../data/data');

const generateAuthTokens = async (req, res, next) => { ... };

const isAuthenticated = async (req, res, next) => {
    try {
        const authToken = req.get('Authorization');
        const accessToken = authToken?.split('Bearer ')[1];
        if (!accessToken) {
            const error = createError.Unauthorized();
            throw error;
        }

        const { signedCookies = {} } = req;

        const { refreshToken } = signedCookies;
        if (!refreshToken) {
            const error = createError.Unauthorized();
            throw error;
        }

        let refreshTokenInDB = tokens.find(token => token.refreshToken === refreshToken);

        if (!refreshTokenInDB) {
            const error = createError.Unauthorized();
            throw error;
        }

        refreshTokenInDB = refreshTokenInDB.refreshToken;

        let decodedToken;
        try {
            decodedToken = jwt.verify(accessToken, ACCESS_TOKEN_SECRET);
        } catch (err) {
            const error = createError.Unauthorized();
            return next(error);
        }

        const { userId } = decodedToken;

        const user = users.find(user => user.id == userId);
        if (!user) {
            const error = createError.Unauthorized();
            throw error;
        }

        req.userId = user.id;
        return next();
    } catch (error) {
        return next(error);
    }
};

module.exports = {
    generateAuthTokens,
    isAuthenticated
}
This middleware function checks whether the incoming request is authenticated or not. It does this by first checking if the request has an access token in the authorization header. If it doesn't, the function throws an error indicating that the request is unauthorized.
If the request has an access token, the middleware function checks for the presence of a refresh token in a signed cookie. If there is no refresh token, the function throws an error indicating that the request is unauthorized.
If the request has both an access token and a refresh token, the middleware function checks whether the refresh token is present in the database. If it is not, the function throws an error indicating that the request is unauthorized.
If the refresh token is present in the database, the middleware function attempts to decode the access token using the access token secret. If the decoding fails, the function throws an error indicating that the request is unauthorized.
If the decoding succeeds, the middleware function retrieves the user ID from the decoded token, and checks if there is a user in the database with that ID. If there is no user, the function throws an error indicating that the request is unauthorized.
If the user is found, the middleware function sets the userId property of the request object to the user's ID and calls the next() function to pass control to the next middleware function in the chain.
Adding Utility Functions
Add this code inside the auth.js file inside the utils directory.
const jwt = require('jsonwebtoken');

const { tokens } = require('../data/data');

const dev = process.env.NODE_ENV === 'development';

const generateJWT = (userId, secret, expirationTime) => {
    return jwt.sign(
        {
            userId,
        },
        secret,
        { expiresIn: expirationTime }
    );
}
const clearTokens = async (req, res) => {
    const { signedCookies = {} } = req;
    const { refreshToken } = signedCookies;
    if (refreshToken) {
        const index = tokens.findIndex(token => token.refreshToken === refreshToken);
        if(index) {
            tokens.splice(index, 1);
        }
    }
    res.clearCookie('refreshToken', {
        httpOnly: true,
        secure: !dev,
        signed: true,
    });
};

module.exports = {
    generateJWT,
    clearTokens
};
generateJWT: This function is used to generate the access and refresh token using thejsonwebtokenlibrary.clearTokens: This function is used clear the refresh token from the database and the cookie when a user logs out from the application.
Creating React Application
Run the following commands to initialize the React application and install the required dependencies.
cd refresh-token-auth-app
npx create-react-app client
cd client
npm install axios react-router-dom react-hook-form
npm install --save-dev sass
Folder Structure
Before we start writing any code, let's create the folder structure required for the front-end application.
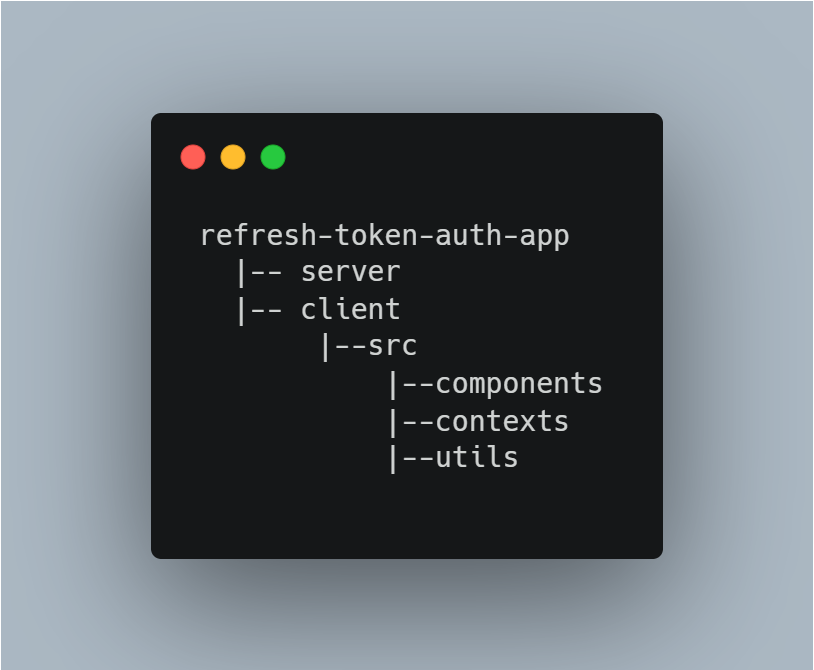
You can create the above directories with these commands.
cd client/src
mkdir components contexts utils
(Optional) Adding fonts and styles
- Add this font to the
headsection of theindex.htmlfile under thepublicdirectory.
<link href="https://fonts.googleapis.com/css2?family=Urbanist:wght@300;400;500;700&display=swap" rel="stylesheet" />
- Replace the
CSScode inside theindex.csswith the code below:
*::before,
*,
*::after {
  margin: 0;
  padding: 0;
  box-sizing: border-box;
  font-family: inherit;
}

body {
  margin: 0;
  font-family: 'Urbanist', sans-serif;
  -webkit-font-smoothing: antialiased;
  -moz-osx-font-smoothing: grayscale;
}
- And finally, remove the code inside the
App.cssfile or delete theApp.cssas we won't need this file in this tutorial.
Proxying API Requests
Add this line of code to the package.json file if you want to write requests like axios.post('/api/auth/sign-up') instead of axios.post('http://localhost:5000/api/auth/sign-up')
"proxy": "http://localhost:5000"
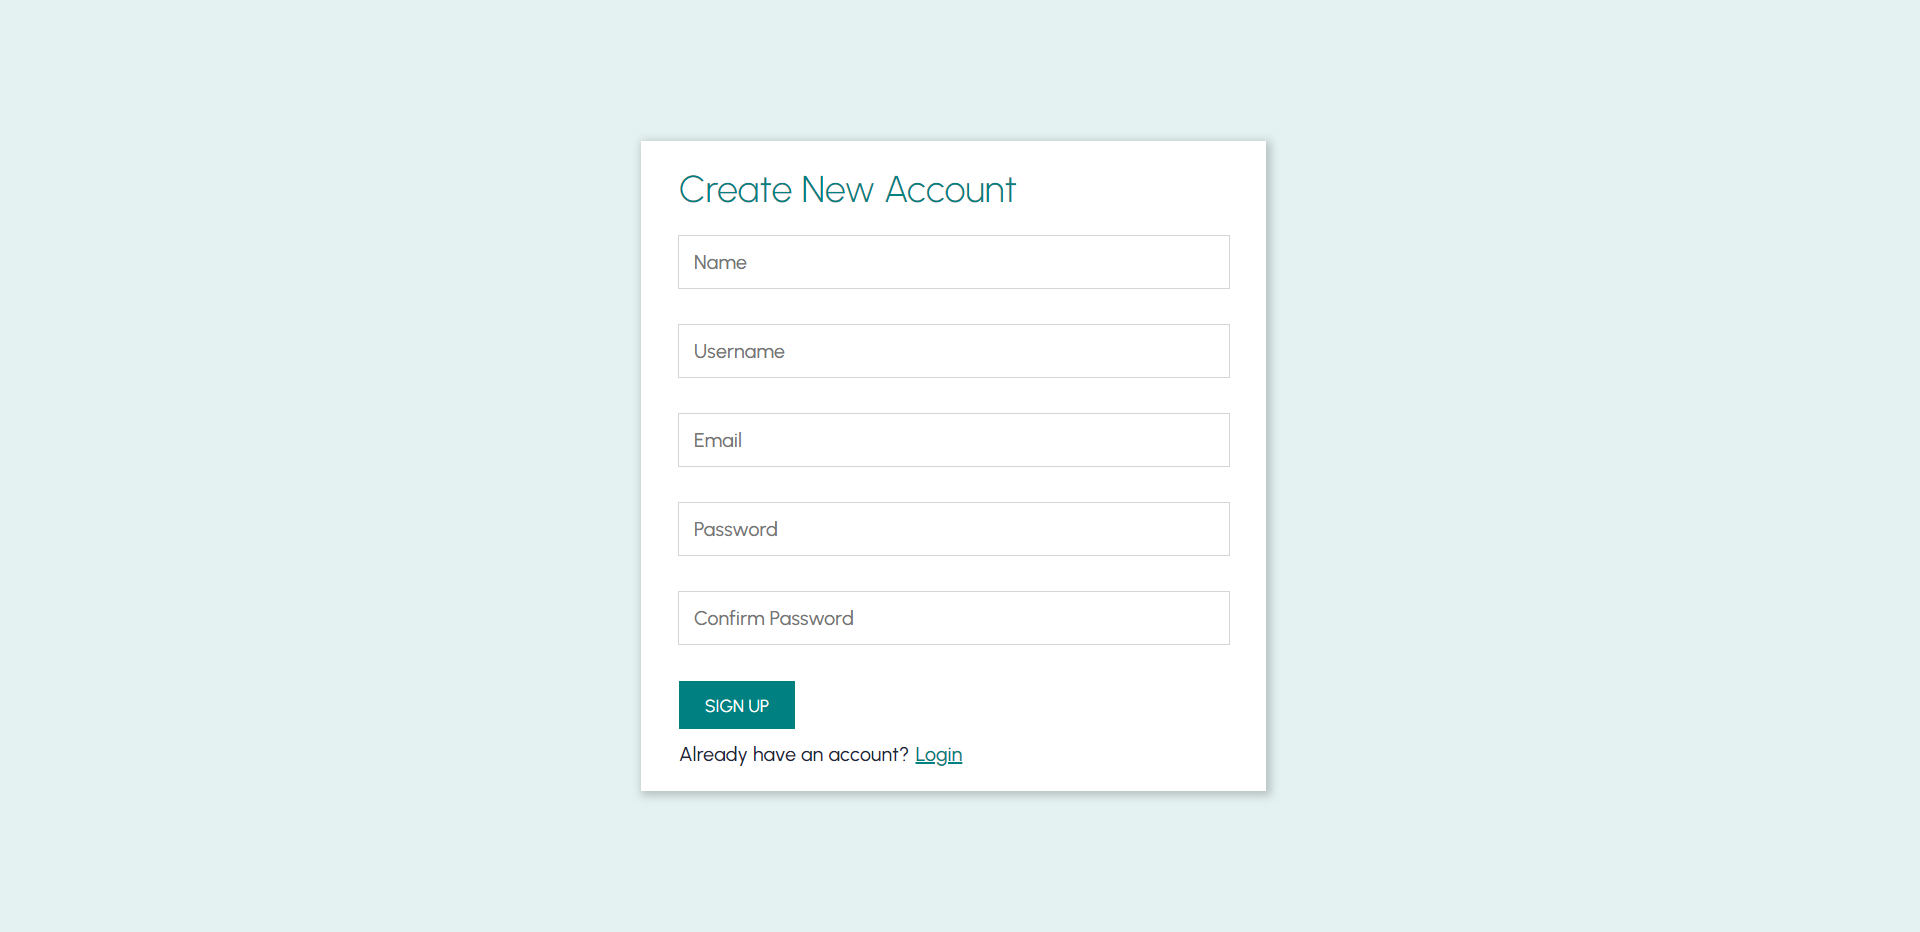
Signup Component
Let's start by creating the signup component, which allows users to sign up for our application by filling out the signup form.
Note:— We will use CSS modules to style our React application. So for each component, we will also create a CSS or SCSS file for that component.
Signup.js
Create a new folder Signup under the components directory and create a new file Signup.js under that new folder.
import { Link } from "react-router-dom";
import { useForm } from "react-hook-form";

import styles from "./Signup.module.scss";

const Signup = () => {
  const {
    handleSubmit,
    register,
    formState: { errors, touchedFields },
  } = useForm({
    defaultValues: {
      name: "",
      username: "",
      email: "",
      password: "",
      confirmPassword: "",
    },
    mode: "onChange",
  });

  const onSubmit = async (values) => {};

  return (
    <div className={styles.container}>
      <div className={styles.formWrapper}>
        <form className={styles.form} onSubmit={handleSubmit(onSubmit)}>
          <h1 className={styles.formTitle}>Create New Account</h1>
          <div className={styles.formGroup}>
            <input
              className={styles.input}
              type="text"
              name="name"
              id="name"
              placeholder="Name"
              {...register("name", {
                required: { value: true, message: "Name is required." },
                minLength: { value: 2, message: "Name cannot be less than 2 characters" },
                maxLength: { value: 30, message: "Name cannot be more than 30 characters" },
              })}
            />
            <div className={styles.validationError}>
              <span>{touchedFields.name && errors.name?.message}</span>
            </div>
          </div>
          <div className={styles.formGroup}>
            <input
              className={styles.input}
              type="text"
              name="username"
              id="username"
              placeholder="Username"
              {...register("username", {
                required: { value: true, message: "Username is required." },
                minLength: { value: 2, message: "Username cannot be less than 2 characters" }
              })}
            />
            <div className={styles.validationError}>
              <span>{touchedFields.username && errors.username?.message}</span>
            </div>
          </div>
          <div className={styles.formGroup}>
            <input
              className={styles.input}
              type="email"
              name="email"
              id="email"
              autoComplete="email"
              placeholder="Email"
              {...register("email", {
                required: { value: true, message: "Email is required." },
                pattern: { value: /^[a-zA-Z0-9._%+-]+@[a-zA-Z0-9.-]+\.[a-zA-Z]{2,}$/, message: 'Please enter a valid email'}
              })}
            />
            <div className={styles.validationError}>
              <span>{touchedFields.email && errors.email?.message}</span>
            </div>
          </div>
          <div className={styles.formGroup}>
            <input
              className={styles.input}
              type="password"
              name="password"
              id="password"
              autoComplete="new-password"
              placeholder="Password"
              {...register("password", {
                required: { value: true, message: "Password is required." },
                minLength: { value: 6, message: "Password cannot be less than 6 characters"},
                maxLength: { value: 30, message: "Password cannot be more than 30 characters"}
              })}
            />
            <div className={styles.validationError}>
              <span>{touchedFields.password && errors.password?.message}</span>
            </div>
          </div>
          <div className={styles.formGroup}>
            <input
              className={styles.input}
              type="password"
              name="confirmPassword"
              id="confirmPassword"
              autoComplete="new-password"
              placeholder="Confirm Password"
              {...register("confirmPassword", {
                required: {
                  value: true,
                  message: "confirmPassword is required.",
                },
                validate: (value, formValues) => {
                  if(value !== formValues.password) {
                    return 'Confirm password does not match the password';
                  }
                  return true;
                }
              })}
            />
            <div className={styles.validationError}>
              <span>
                {touchedFields.confirmPassword &&
                  errors.confirmPassword?.message}
              </span>
            </div>
          </div>
          <div className={styles.formGroup}>
                <button className={styles.submitButton} type="submit">Sign Up</button>
          </div>
          <p className={styles.text}>
            <span>
              Already have an account?
            </span>
          <Link className={styles.link} to="/login">Login</Link>
          </p>
        </form>
      </div>
    </div>
  );
}

export default Signup;
It's just a simple sign-up form that contains name, username, email, password, and confirm password input fields using which a user can sign up for our application.
Note:— Here I am using the React Hook Form library to manage the sign-up form. You can use the HTML form validation to validate the form if you don't want to use any external library.
Signup.module.scss
Add this code inside the Signup.module.scss under the Signup folder to style the sign-up form.
.container {
  display: flex;
  justify-content: center;
  background-color: rgb(0 128 128 / 10%);
  padding: 40px 20px;
  min-height: 100vh;
}

.formWrapper {
  display: flex;
  justify-content: center;
  box-sizing: border-box;
  align-items: center;
  width: 100%;
}

.form {
  padding: 20px 30px;
  width: 500px;
  background: #fff;
  box-shadow: 2px 2px 7px 2px rgb(0 0 0 / 20%);
  margin-right: 10px;

  @media (max-width: 768px) {
    width: 100%;
  }
}

.formTitle {
  color: teal;
  font-weight: 300;
  text-align: left;
  margin-bottom: 20px;
  font-size: 30px;

  @media (max-width: 768px) {
    font-size: 22px;
  }
}

.formGroup {
  position: relative;
  margin: 10px 0;
}

.input {
  font-size: 16px;
  padding: 11px 12px;
  width: 100%;
  outline: 1px solid #d4d5d9;
  border: none;
  color: #282c3f;
  caret-color: teal;
  font-weight: 500;

  &:focus {
    outline: 1px solid teal;
  }

  @media (max-width: 768px) {
    font-size: 14px;
  }

  @media (max-width: 768px) {
    font-size: 14px;
  }
}

.submitButton {
  background: teal;
  color: white;
  border: 1px solid transparent;
  padding: 10px 20px;
  font-size: 14px;
  text-transform: uppercase;
  cursor: pointer;
}

.validationError {
  color: red;
  height: 20px;
}

.text {
  color: #1b2839;
  font-weight: 500;

  @media (max-width: 768px) {
    font-size: 14px;
  }

  @media (max-width: 768px) {
    font-size: 14px;
  }
}

.link {
  color: teal;
  margin-left: 5px;
}
Adding the Sign-up Route
Replace the code inside the App.js file with the code below:
import { createBrowserRouter, RouterProvider } from "react-router-dom";

import Signup from "./components/Signup/Signup";

function App() {
  const router = createBrowserRouter([
    {
      path: "/",
      element: <h1>Hello World!!</h1>,
    },
    {
      path: "sign-up",
      element: <Signup />,
    },
  ]);

  return (
    <div className="App">
      <RouterProvider router={router} />
    </div>
  );
}

export default App;
You can now visit the sign-up page by going to http://localhost:3000/sign-up
Making the Form Work
So we have made the sign-up form but the users can't actually sign up through it. Let's connect the form with the backend, which allows users to sign up if they haven't already.
Saving Authentication State Using Context API
Before we connect our form with the backend, let's create a context to store the currently authenticated user.
auth-context.js
Add this file under the src/contexts directory and add the following code to that file.
import * as React from 'react';
import PropTypes from 'prop-types';

import { STATUS } from '../utils/utils';

const initialState = {
  user: {},
  token: null,
  expiresAt: null,
  isAuthenticated: false,
  status: STATUS.PENDING,
};

const AuthContext = React.createContext({
  ...initialState,
  login: (user = {}, token = '', expiresAt = '') => {},
  logout: () => {},
  updateUser: () => {},
  setAuthenticationStatus: () => {},
});

const authReducer = (state, action) => {
  switch (action.type) {
    case 'login': {
      return {
        user: action.payload.user,
        token: action.payload.token,
        expiresAt: action.payload.expiresAt,
        isAuthenticated: true,
        verifyingToken: false,
        status: STATUS.SUCCEEDED,
      };
    }
    case 'logout': {
      return {
        ...initialState,
        status: STATUS.IDLE,
      };
    }
    case 'updateUser': {
      return {
        ...state,
        user: action.payload.user,
      };
    }
    case 'status': {
      return {
        ...state,
        status: action.payload.status,
      };
    }
    default: {
      throw new Error(`Unhandled action type: ${action.type}`);
    }
  }
};

const AuthProvider = ({ children }) => {
  const [state, dispatch] = React.useReducer(authReducer, initialState);

  const login = React.useCallback((user, token, expiresAt) => {
    dispatch({
      type: 'login',
      payload: {
        user,
        token,
        expiresAt,
      },
    });
  }, []);

  const logout = React.useCallback(() => {
    dispatch({
      type: 'logout',
    });
  }, []);

  const updateUser = React.useCallback((user) => {
    dispatch({
      type: 'updateUser',
      payload: {
        user,
      },
    });
  }, []);

  const setAuthenticationStatus = React.useCallback((status) => {
    dispatch({
      type: 'status',
      payload: {
        status,
      },
    });
  }, []);

  const value = React.useMemo(
    () => ({ ...state, login, logout, updateUser, setAuthenticationStatus }),
    [state, setAuthenticationStatus, login, logout, updateUser]
  );

  return <AuthContext.Provider value={value}>{children}</AuthContext.Provider>;
};

const useAuth = () => {
  const context = React.useContext(AuthContext);

  if (context === undefined) {
    throw new Error('useAuth must be used within a AuthProvider');
  }

  return context;
};

AuthProvider.propTypes = {
  children: PropTypes.element.isRequired,
};

export { AuthProvider, useAuth };
In this code, I am using a custom hook useAuth which returns the current context value created using the AuthContext which contains the authentication state along with the functions used to log in, log out, and update the authentication status.
I am also defining a component AuthProvider that returns the context provider AuthContext.Provider. The AuthProvider component uses the useReducer hook to update the authentication state whenever a user logs in or logs out of the application.
The state returned by the useReducer is then passed as the value (along with functions like login and logout which updates the auth state using the dispatch method returned by the useReducer hook) to the AuthContext.Provider. The AuthContext.Provider also contains components passed to the AuthProvider component as children.
utils.js
Add this code inside the src/utils/utils.js file.
const STATUS = Object.freeze({
  IDLE: 'idle',
  PENDING: 'pending',
  SUCCEEDED: 'succeeded',
  FAILED: 'failed',
});

export {
    STATUS
}
This code defines an object which is used to represent the status of an HTTP request whether it is pending, failed, or succeeded.
Using the AuthProvider
Replace the code inside the src/index.js file with the code below:
import React from 'react';
import ReactDOM from 'react-dom/client';
import './index.css';
import App from './App';
import reportWebVitals from './reportWebVitals';
import { AuthProvider } from './contexts/auth-context';

const root = ReactDOM.createRoot(document.getElementById('root'));
root.render(
  <React.StrictMode>
    <AuthProvider>
      <App />
    </AuthProvider>
  </React.StrictMode>
);

// If you want to start measuring performance in your app, pass a function
// to log results (for example: reportWebVitals(console.log))
// or send to an analytics endpoint. Learn more: https://bit.ly/CRA-vitals
reportWebVitals();
Using this code, every component nested deep inside the <App /> component can now access and update the authentication state using the useAuth custom hook.
Connecting the form with the backend
Update the code inside the Signup.js file with the code below:
import { Link, useNavigate } from "react-router-dom";
import { useForm } from "react-hook-form";
import axios from "axios";

import { useAuth } from "../../contexts/auth-context";
import { STATUS } from "../../utils/utils";

import styles from "./Signup.module.scss";

const Signup = () => {
  // Existing code
  const {
    handleSubmit,
    register,
    formState: { errors, touchedFields },
  } = useForm({
    defaultValues: {
      name: "",
      username: "",
      email: "",
      password: "",
      confirmPassword: "",
    },
    mode: "onChange",
  });

  // New code
  const navigate = useNavigate();

  const { login, setAuthenticationStatus } = useAuth();

  const onSubmit = async (values) => {
    const newUser = {
      name: values.name,
      username: values.username,
      email: values.email,
      password: values.password,
      confirmPassword: values.confirmPassword,
    };

    try {
      setAuthenticationStatus(STATUS.PENDING);
      const response = await axios.post("/api/auth/sign-up", newUser);
      setAuthenticationStatus(STATUS.SUCCEEDED);
      const { user, token, expiresAt } = response.data;
      login(user, token, expiresAt);
      navigate("/");
    } catch (error) {
      alert(error.response.data.error.message);
      setAuthenticationStatus(STATUS.FAILED);
    }
  };

  // Existing code
  return (
    <div className={styles.container}>
      <div className={styles.formWrapper}>
        <form className={styles.form} onSubmit={handleSubmit(onSubmit)}>
          <h1 className={styles.formTitle}>Create New Account</h1>
          <div className={styles.formGroup}>
            <input
              className={styles.input}
              type="text"
              name="name"
              id="name"
              placeholder="Name"
              {...register("name", {
                required: { value: true, message: "Name is required." },
                minLength: {
                  value: 2,
                  message: "Name cannot be less than 2 characters",
                },
                maxLength: {
                  value: 30,
                  message: "Name cannot be more than 30 characters",
                },
              })}
            />
            <div className={styles.validationError}>
              <span>{touchedFields.name && errors.name?.message}</span>
            </div>
          </div>
          <div className={styles.formGroup}>
            <input
              className={styles.input}
              type="text"
              name="username"
              id="username"
              placeholder="Username"
              {...register("username", {
                required: { value: true, message: "Username is required." },
                minLength: {
                  value: 2,
                  message: "Username cannot be less than 2 characters",
                },
              })}
            />
            <div className={styles.validationError}>
              <span>{touchedFields.username && errors.username?.message}</span>
            </div>
          </div>
          <div className={styles.formGroup}>
            <input
              className={styles.input}
              type="email"
              name="email"
              id="email"
              autoComplete="email"
              placeholder="Email"
              {...register("email", {
                required: { value: true, message: "Email is required." },
                pattern: {
                  value: /^[a-zA-Z0-9._%+-]+@[a-zA-Z0-9.-]+\.[a-zA-Z]{2,}$/,
                  message: "Please enter a valid email",
                },
              })}
            />
            <div className={styles.validationError}>
              <span>{touchedFields.email && errors.email?.message}</span>
            </div>
          </div>
          <div className={styles.formGroup}>
            <input
              className={styles.input}
              type="password"
              name="password"
              id="password"
              autoComplete="new-password"
              placeholder="Password"
              {...register("password", {
                required: { value: true, message: "Password is required." },
                minLength: {
                  value: 6,
                  message: "Password cannot be less than 6 characters",
                },
                maxLength: {
                  value: 30,
                  message: "Password cannot be more than 30 characters",
                },
              })}
            />
            <div className={styles.validationError}>
              <span>{touchedFields.password && errors.password?.message}</span>
            </div>
          </div>
          <div className={styles.formGroup}>
            <input
              className={styles.input}
              type="password"
              name="confirmPassword"
              id="confirmPassword"
              autoComplete="new-password"
              placeholder="Confirm Password"
              {...register("confirmPassword", {
                required: {
                  value: true,
                  message: "confirmPassword is required.",
                },
                validate: (value, formValues) => {
                  if (value !== formValues.password) {
                    return "Confirm password does not match the password";
                  }
                  return true;
                },
              })}
            />
            <div className={styles.validationError}>
              <span>
                {touchedFields.confirmPassword &&
                  errors.confirmPassword?.message}
              </span>
            </div>
          </div>
          <div className={styles.formGroup}>
            <button className={styles.submitButton} type="submit">
              Sign Up
            </button>
          </div>
          <p className={styles.text}>
            <span>Already have an account?</span>
            <Link className={styles.link} to="/login">
              Login
            </Link>
          </p>
        </form>
      </div>
    </div>
  );
};

export default Signup;
The onSubmit method is called when the user submits the signup form. Inside the function, a new object called newUser is created with its properties set to form values. Inside the try...catch block, we call the signup API with the newUser object as the request body.
If the request is successful, we extract the user, token, and the token expiry time from the response and call the login function from the useAuth hook. This function updates the authentication state with the new user and token, and redirects the user to the home page.
Login Component
Login.js
Add this code inside the Login.js file under the src/components/Login directory.
import { Link, useNavigate } from "react-router-dom";
import { useForm } from "react-hook-form";
import axios from "axios";
import { useAuth } from "../../contexts/auth-context";
import { STATUS } from "../../utils/utils";
import styles from "./Login.module.scss";
const Login = () => {
const {
handleSubmit,
register,
formState: { errors, touchedFields },
} = useForm({
defaultValues: {
username: "",
password: "",
},
mode: "onChange",
});
const navigate = useNavigate();
const { login, setAuthenticationStatus } = useAuth();
const onSubmit = async (values) => {
const user = {
username: values.username,
password: values.password,
};
try {
setAuthenticationStatus(STATUS.PENDING);
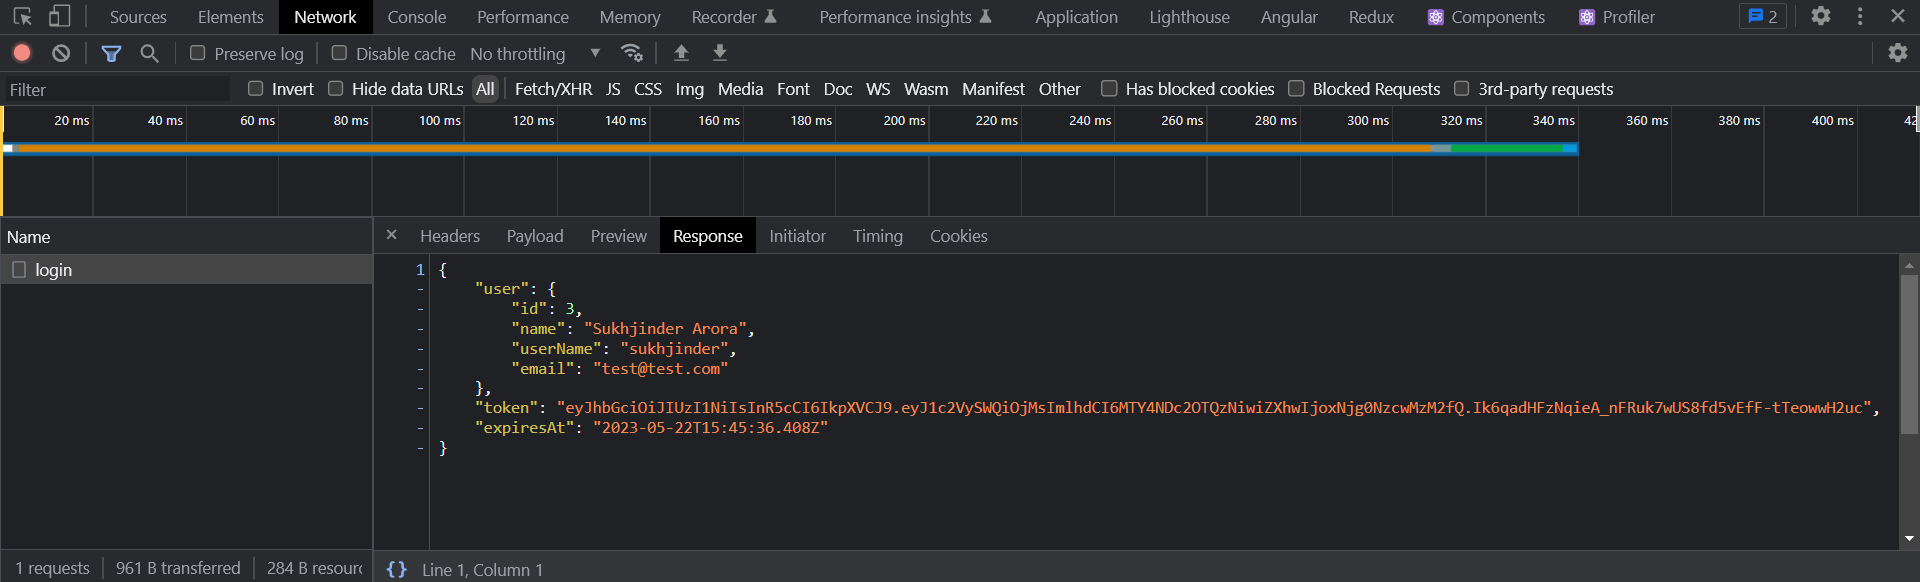
const response = await axios.post("/api/auth/login", user);
setAuthenticationStatus(STATUS.SUCCEEDED);
const { user: userObj, token, expiresAt } = response.data;
login(userObj, token, expiresAt);
navigate('/');
} catch (error) {
alert(error.response.data.error.message);
}
};
return (
<div className={styles.container}>
<div className={styles.formWrapper}>
<form className={styles.form} onSubmit={handleSubmit(onSubmit)}>
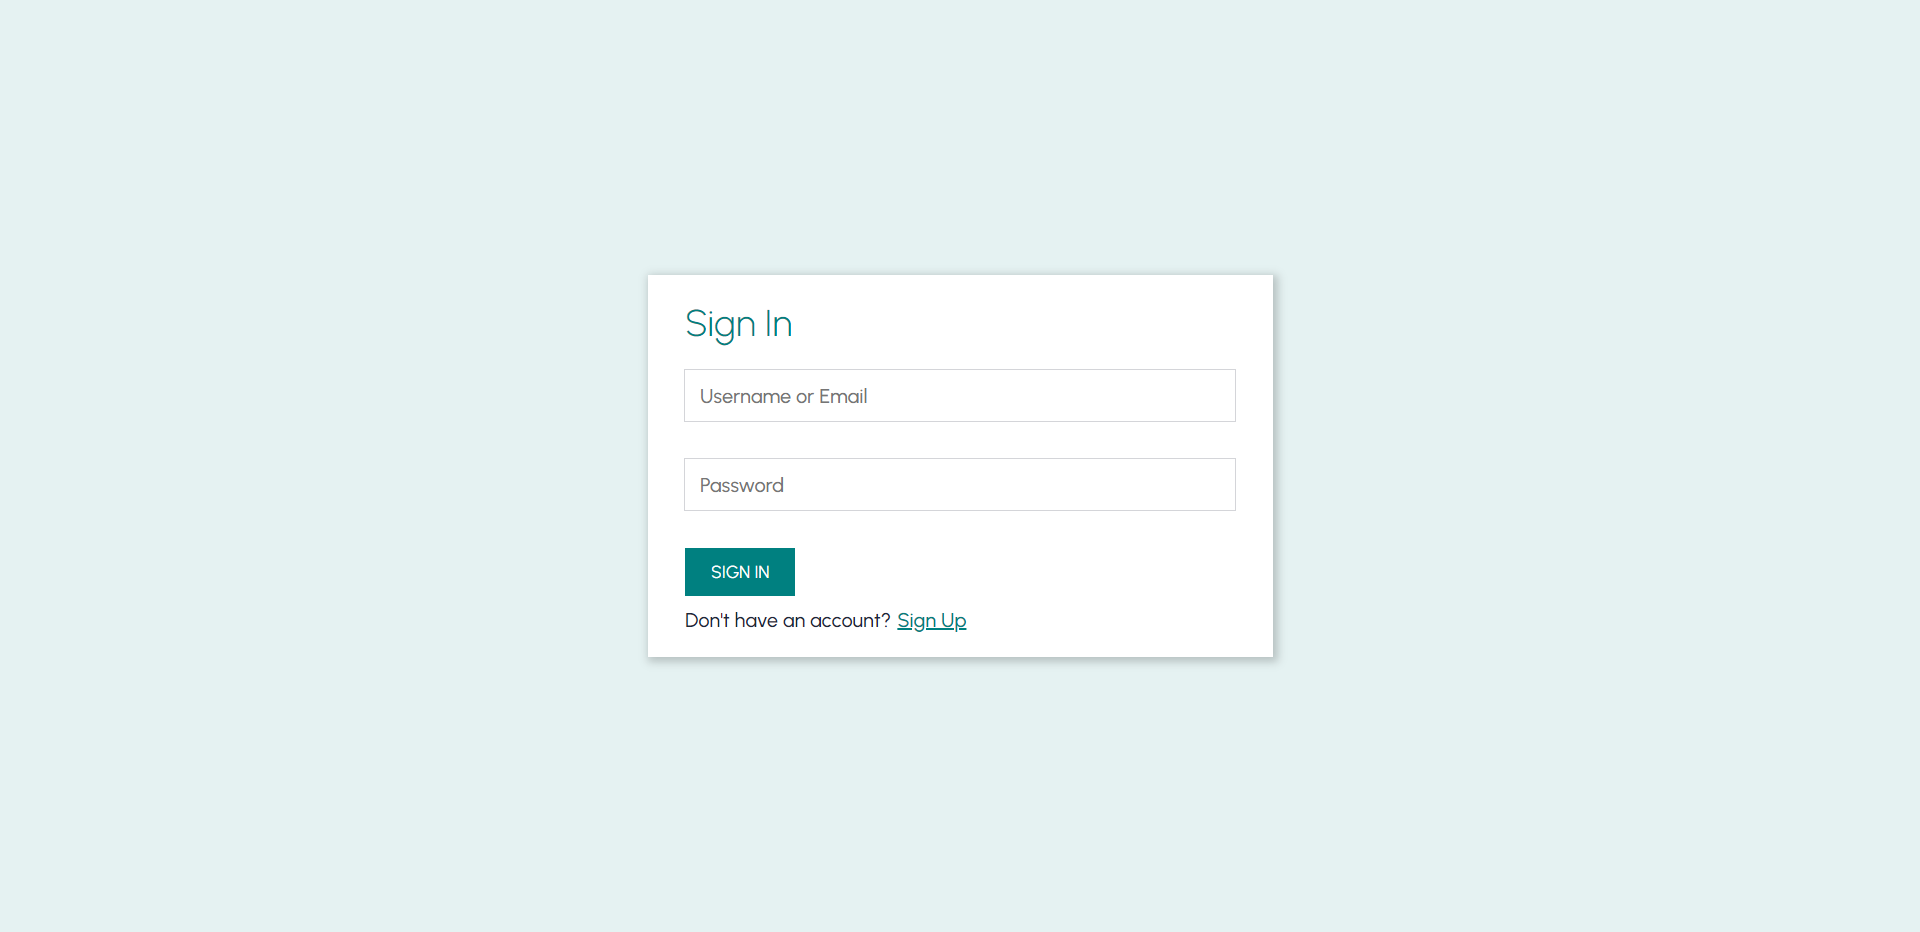
<h1 className={styles.formTitle}>Sign In</h1>
<div className={styles.formGroup}>
<input
className={styles.input}
type="text"
name="username"
id="username"
aria-label="Username or Email"
required
placeholder="Username or Email"
{...register("username", {
required: { value: true, message: "This field is required." },
})}
/>
<div className={styles.validationError}>
<span>{touchedFields.name && errors.name?.message}</span>
</div>
</div>
<div className={styles.formGroup}>
<input
className={styles.input}
type="password"
name="password"
id="password"
required
placeholder="Password"
{...register("password", {
required: { value: true, message: "Password is required." },
})}
/>
<div className={styles.validationError}>
<span>{touchedFields.password && errors.password?.message}</span>
</div>
</div>
<div className={styles.formGroup}>
<button className={styles.submitButton} type="submit">
Sign In
</button>
</div>
<p className={styles.text}>
<span>Don't have an account?</span>
<Link className={styles.link} to="/sign-up">
Sign Up
</Link>
</p>
</form>
</div>
</div>
);
};
export default Login;
Login.module.scss
Add this code inside the Login.module.scss file under the src/components/Login directory.
.container {
  min-height: 100vh;
  background-color: rgb(0 128 128 / 10%);
  display: flex;
  justify-content: center;
  align-items: center;
  padding: 40px 20px;
}

.formWrapper {
  max-width: 500px;
  width: 100%;
}

.form {
  background-color: #fff;
  box-shadow: 2px 2px 7px 2px rgb(0 0 0 / 20%);
  width: 100%;
  padding: 20px 30px;
}

.formTitle {
  color: teal;
  font-weight: 300;
  text-align: left;
  margin-bottom: 20px;
  font-size: 30px;
}

.formGroup {
  position: relative;
  margin: 10px 0;
}

.input {
  font-size: 16px;
  padding: 11px 12px;
  width: 100%;
  outline: 1px solid #d4d5d9;
  border: none;
  color: #282c3f;
  caret-color: teal;
  font-weight: 500;

  &:focus {
    outline: 1px solid teal;
  }

  @media (max-width: 768px) {
    font-size: 14px;
  }

  @media (max-width: 768px) {
    font-size: 14px;
  }
}

.submitButton {
  background: teal;
  color: white;
  border: 1px solid transparent;
  padding: 10px 20px;
  font-size: 14px;
  text-transform: uppercase;
  cursor: pointer;

  :disabled {
    background-color: grey;
  }
}

.validationError {
  color: red;
  height: 20px;
}

.text {
  color: #1b2839;
  font-weight: 500;

  @media (max-width: 768px) {
    font-size: 14px;
  }

  @media (max-width: 768px) {
    font-size: 14px;
  }
}

.link {
  color: teal;
  margin-left: 5px;
}
Adding the Login Route
Replace the code inside the App.js file with the code below:
import { createBrowserRouter, RouterProvider } from "react-router-dom";

import Signup from "./components/Signup/Signup";
import Login from './components/Login/Login';

function App() {
  const router = createBrowserRouter([
    {
      path: "/",
      element: <h1>Hello World!!</h1>,
    },
    {
      path: "sign-up",
      element: <Signup />,
    },
    {
    path: "login",
    element: (
        <Login />
    ),
  },
  ]);

  return (
    <div className="App">
      <RouterProvider router={router} />
    </div>
  );
}

export default App;
You can now visit the login page by going to http://localhost:3000/login
Adding Silent Authentication
As we know the access token is only valid for 15 minutes, without silent authentication the user will have to log in again every time the token expires. To prevent users from getting logged out every time the token expires let's implement silent authentication:
What is Silent Authentication?
Silent Authentication is the process of refreshing the user's access token in the background before the token expires or when a user reloads the page. Because we are not storing access tokens in local storage (to prevent XSS attacks), we have to perform silent authentication on page reload as well.
Replace the code inside the App.js with the code below:
import { useCallback, useEffect } from "react";
import { createBrowserRouter, RouterProvider } from "react-router-dom";
import axios from "axios";

import Signup from "./components/Signup/Signup";
import Login from "./components/Login/Login";

import { useAuth } from "./contexts/auth-context";

function App() {
  // New Code
  const { login, logout, isAuthenticated, expiresAt } = useAuth();

  const refreshAccessToken = useCallback(async () => {
    try {
      const response = await axios.post(
        "/api/auth/refresh",
        {},
        {
          withCredentials: true,
        }
      );

      const { user, accessToken, expiresAt } = response.data;

      if (response.status === 204) {
        logout();
      } else {
        login(user, accessToken, expiresAt);
      }
    } catch (error) {
      logout();
    }
  }, [login, logout]);

  useEffect(() => {
    refreshAccessToken();
  }, [refreshAccessToken]);

  useEffect(() => {
    let refreshAccessTokenTimerId;

    if (isAuthenticated) {
      refreshAccessTokenTimerId = setTimeout(() => {
        refreshAccessToken();
      }, new Date(expiresAt).getTime() - Date.now() - 10 * 1000);
    }

    return () => {
      if (isAuthenticated && refreshAccessTokenTimerId) {
        clearTimeout(refreshAccessTokenTimerId);
      }
    };
  }, [expiresAt, isAuthenticated, refreshAccessToken]);

  // Existing code
  const router = createBrowserRouter([
    {
      path: "/",
      element: <h1>Hello World!!</h1>,
    },
    {
      path: "sign-up",
      element: <Signup />,
    },
    {
      path: "login",
      element: <Login />,
    },
  ]);

  return (
    <div className="App">
      <RouterProvider router={router} />
    </div>
  );
}

export default App;
So What's happening here?
Let's break down the code and explain its functionality step by step:
refreshAccessTokenfunction: This function is responsible for refreshing the access token. It does so by making aPOSTrequest to/api/auth/refreshendpoint. Since the refresh token is stored as anhttpOnlycookie, I am also setting thewithCredentialsoption to true to automatically send the refresh token with the request. If the request is successful, we call theloginfunction to update the access token stored in memory, otherwise, we log out the user if there's any error.Performing silent authentication on page reload: Since the access token is stored only in the memory and not in local storage or cookie, we have to perform silent authentication whenever the page reloads or the application is loaded for the first time. We do this by calling the
refreshAccessTokenfunction inside the firstuseEffecthook that only runs when theAppcomponent is mounted.Performing silent authentication before the access token expires: The second
useEffectis responsible for performing silent authentication before the access token expires. This effect runs whenever a user signs up or logs in to the application or when the access token is refreshed. Inside this effect, we first check if the user is authenticated, if yes then we set a timer using thesetTimeoutwhich executes therefreshAccessToken()function 10 seconds before the access token expires. We clear the timer when the effect cleanup is run.
Adding additional routes and components
A user is now able to sign up and log in to our application and can remain logged in as long as the refresh token is valid. Let's add some more routes and components which a user can only access when they are authenticated.
Adding Home Component
Add this code inside the Home.js file under the src/components/Home directory.
import { useAuth } from "../../contexts/auth-context";

import styles from "./Home.module.scss";

const Home = () => {
  const { user } = useAuth();

  return (
    <div className={styles.container}>
      <h1 className={styles.heading}><span className={styles.colorTeal}>Welcome</span> <span className={styles.colorBlack}>{user.name}</span></h1>
    </div>
  );
};

export default Home;
This is just a simple home page where we print the currently authenticated user's name on the screen.
Home.module.scss
Add this code inside the Home.module.scss file under the src/components/Home directory.
.container {
    margin-top: 120px;
    padding: 15px;
}

.heading {
    text-align: center;
}

.colorTeal {
    color: teal;
}

.colorBlack {
    color: #1b2839;
}
Adding Users Component
Add this code inside the Users.js file under the src/components/Users directory.
import { useEffect, useState } from "react";
import axios from "axios";

import User from "./User/User";

import { useAuth } from "../../contexts/auth-context";

import styles from './Users.module.scss';

const Users = () => {
  const { token } = useAuth();
  const [users, setUsers] = useState([]);

  useEffect(() => {
    axios
      .get("/api/users/list", {
        headers: {
          Authorization: `Bearer ${token}`,
        },
      })
      .then((res) => {
        setUsers(res.data.data);
      })
      .catch((error) => {
        console.log("Something went wrong.", error);
      });
  }, [token]);

  return (
    <div className={styles.container}>
      {users.map((user) => (
        <div key={user.id} className={styles.userContainer}>
            <User user={user}/>
        </div>
      ))}
    </div>
  );
};

export default Users;
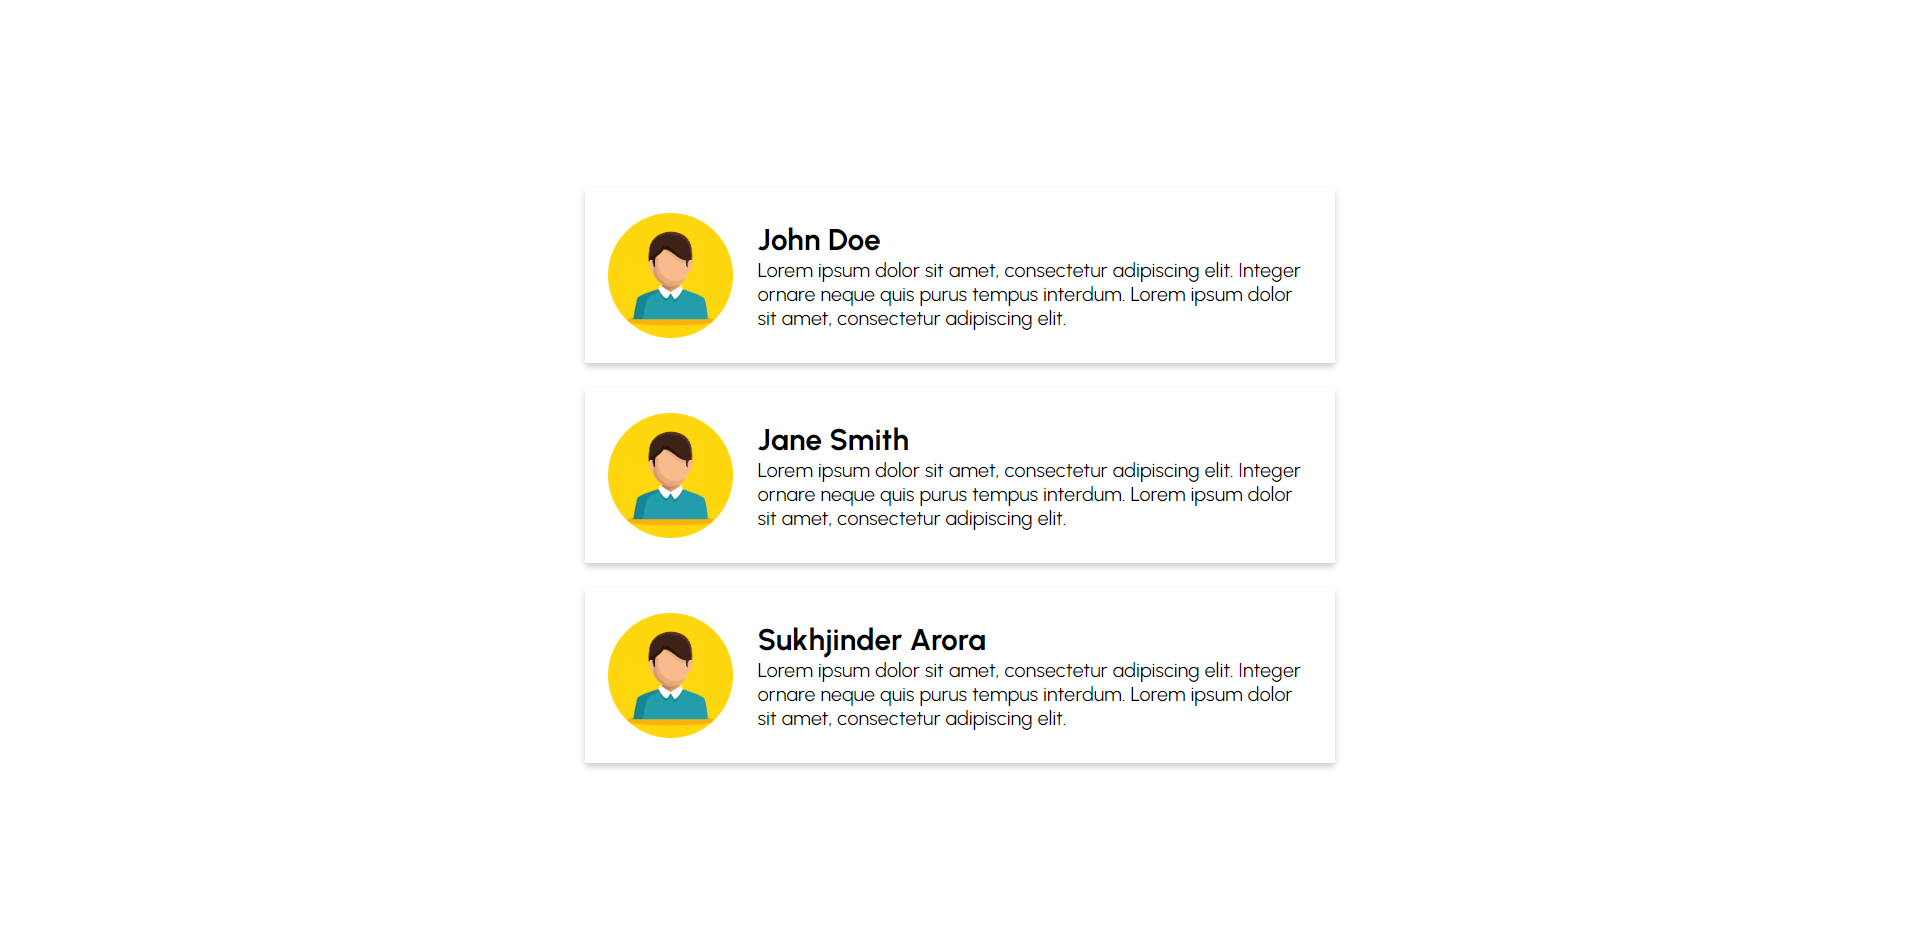
In this component, we first fetch the list of users using an HTTP GET request to the /api/users/list endpoint passing the access token as an Authorization header. If the request is successful, we set users state with the user list received from the server.
Users.module.scss
Add this code inside the Users.module.scss file under the src/components/Users directory.
.container {
    margin-top: 150px;
}

.userContainer {
    margin-bottom: 20px;
}
Adding User Component
Add this code inside the User.js file under the src/components/Users/User directory.
import styles from './User.module.scss';

const User = ({ user }) => {
  return (
    <div className={styles.container}>
      <div className={styles.imageContainer}>
        <img
          className={styles.image}
          src="https://img.freepik.com/free-vector/businessman-character-avatar-isolated_24877-60111.jpg"
          alt="User Avatar"
        />
      </div>
      <div>
        <h2>{user.name}</h2>
        <p>
          Lorem ipsum dolor sit amet, consectetur adipiscing elit. Integer
          ornare neque quis purus tempus interdum. Lorem ipsum dolor sit amet,
          consectetur adipiscing elit.{" "}
        </p>
      </div>
    </div>
  );
};

export default User;
User.module.scss
Add this code inside the User.module.scss file under the src/components/Users/User directory.
.container {
  display: flex;
  max-width: 600px;
  margin: 0 auto;
  gap: 20px;
  align-items: center;
  box-shadow: 0 3px 5px rgba(0, 0, 0, 0.2);
  padding: 20px 18px;
}

.imageContainer {
  width: 200px;
  height: 100px;
  overflow: hidden;
  flex-basis: 100px;
  flex-shrink: 0;
  flex-grow: 0;
  border-radius: 50%;
}

.image {
  width: 100%;
  height: 100%;
  object-fit: cover;
}
Adding routes for Home and Users components
Update the router config in App.js with the new config.
import { useCallback, useEffect } from "react";
import { createBrowserRouter, RouterProvider } from "react-router-dom";
import axios from "axios";

import Signup from "./components/Signup/Signup";
import Login from "./components/Login/Login";
import Home from "./components/Home/Home";
import Users from "./components/Users/Users";

import { useAuth } from "./contexts/auth-context";

function App() {
  const { login, logout, isAuthenticated, expiresAt } = useAuth();

  const refreshAccessToken = useCallback(async () => {
    try {
      const response = await axios.post(
        "/api/auth/refresh",
        {},
        {
          withCredentials: true,
        }
      );

      const { user, accessToken, expiresAt } = response.data;

      if (response.status === 204) {
        logout();
      } else {
        login(user, accessToken, expiresAt);
      }
    } catch (error) {
      logout();
    }
  }, [login, logout]);

  useEffect(() => {
    refreshAccessToken();
  }, [refreshAccessToken]);

  useEffect(() => {
    let refreshAccessTokenTimerId;

    if (isAuthenticated) {
      refreshAccessTokenTimerId = setTimeout(() => {
        refreshAccessToken();
      }, new Date(expiresAt).getTime() - Date.now() - 10 * 1000);
    }

    return () => {
      if (isAuthenticated && refreshAccessTokenTimerId) {
        clearTimeout(refreshAccessTokenTimerId);
      }
    };
  }, [expiresAt, isAuthenticated, refreshAccessToken]);

// New code
  const router = createBrowserRouter([
    {
      path: "/",
      element: <Home />,
    },
    {
      path: "sign-up",
      element: <Signup />,
    },
    {
      path: "login",
      element: <Login />,
    },
    {
      path: "users",
      element: <Users />
    }
  ]);

// Existing code
  return (
    <div className="App">
      <RouterProvider router={router} />
    </div>
  );
}

export default App;
You can now visit the home and users page by going to http://localhost:3000 and http://localhost:3000/users
Home page

Users Page
Adding Navbar
Let's add a Navbar component that displays Login and Sign up links when the user is not logged in and displays the logout button when a user is logged in.
Navbar.js
Add this code inside the Navbar.js under the src/components/Navbar directory.
import { Link, useNavigate } from "react-router-dom";
import axios from "axios";

import { useAuth } from "../../contexts/auth-context";

import styles from "./Navbar.module.scss";

const Navbar = () => {
  const { isAuthenticated, token, logout } = useAuth();
  const navigate = useNavigate();

  const logOutHandler = async () => {
    try {
      await axios.post(
        "/api/auth/logout",
        {},
        {
          headers: {
            Authorization: `Bearer ${token}`,
          },
        }
      );
      logout();
      navigate('/login');
    } catch (error) {
      console.log("Something went wrong.", error);
    }
  };

  return (
    <header className={styles.header}>
      <nav className={styles.navigation}>
        <div>
          <Link className={styles.brand} to="/">
            Demo App
          </Link>
        </div>
        <div className={styles.navigationListContainer}>
          <ul className={styles.navigationList}>
            {!isAuthenticated && (
              <>
                <li className={styles.navigationItem}>
                  <Link className={styles.navigationLink} to="/login">
                    Login
                  </Link>
                </li>
                <li className={styles.navigationItem}>
                  <Link className={styles.navigationLink} to="/sign-up">
                    Sign Up
                  </Link>
                </li>
              </>
            )}
            {isAuthenticated && (
              <>
                <li className={styles.navigationItem}>
                  <Link className={styles.navigationLink} to="/users">
                    Users
                  </Link>
                </li>
                <li className={styles.navigationItem}>
                  <button
                    className={styles.navigationLink}
                    onClick={logOutHandler}
                  >
                    Log out
                  </button>
                </li>
              </>
            )}
          </ul>
        </div>
      </nav>
    </header>
  );
};

export default Navbar;
There are a couple of things happening here, let me explain them step by step:
Since we are using the
useAuth()custom hook to handle user authentication, it provides us with a set of properties and functions to effectively manage the authentication process.The
isAuthenticatedproperty is used to check if the user is authenticated or not. If the user is authenticated, we show the log-out button; otherwise, we display the login and sign-up buttons.The
logOutHandleris called when a user clicks on the log-out button. It sends a POST request to/api/auth/logoutendpoint with the access token as the Authorization header and calls thelogout()function once we get a successful response back from the server.The
logout()is responsible for clearing the user object from the reducer state.After the user is logged out, we redirect them to the login page.
Navbar.module.scss
Add this code inside the Navbar.module.scss file under the src/components/Navbar directory.
.header {
    height: 70px;
    width: 100%;
    background-color: white;
    display: flex;
    align-items: center;
    padding: 0 20px;
    -webkit-box-shadow: 0px 8px 5px 0px rgba(0, 0, 0, 0.05);
    -moz-box-shadow: 0px 8px 5px 0px rgba(0, 0, 0, 0.05);
    box-shadow: 0px 8px 5px 0px rgba(0, 0, 0, 0.05);
    position: fixed;
    top: 0;
    left: 0;
    right: 0;
    z-index: 100;

    @media (max-width: 768px) {
        height: 60px;
    }
}

.navigation {
    display: flex;
    align-items: center;
    justify-content: space-between;
    flex: 1;
}

.brand {
    color: #1b2839;
    text-decoration: none;
    font-size: 24px;
    font-weight: 700;
    text-transform: uppercase;

    &:hover {
        color: teal;
    }

    @media (max-width: 768px) {
        font-size: 22px;
    }
}

.navigationList {
    display: flex;
    align-items: center;
    justify-content: flex-end;
    list-style: none;
    flex-basis: 33%;

    @media (max-width: 768px) {
        flex-direction: column;
    }
}

.navigationItem {
    margin-right: 20px;
    transition: all 5s;

    @media (max-width: 768px) {
        margin-right: 0;
        margin-bottom: 30px;
    }
}

.navigationLink {
    display: flex;
    flex-direction: column;
    align-items: center;
    justify-content: center;
    color: #1b2839;
    cursor: pointer;
    text-transform: uppercase;
    text-decoration: none;
    font-size: 14px;

    &:hover {
        color: teal;
    }

    &:hover svg {
        stroke: teal;
    }

    &:hover>span {
        color: teal;
    }

    // button styles
    background: none;
    border: none;

    @media (max-width: 768px) {
        flex-direction: row;

        & svg {
            margin-right: 5px;
        }
    }
}
Adding Navbar to the application
We have two choices when it comes to adding the Navbar component to our application. First, we can add it separately to each component, like the Login, Signup, or Home page. Alternatively, we can use the Layout route and component, which allows us to group multiple routes together under a common layout.
Adding Layout route and component
Layout.js
Add this code inside the Layout.js file under the src/components/Layout directory.
import { Outlet } from "react-router-dom";

import Navbar from "../Navbar/Navbar";

const Layout = () => {
  return (
    <div>
      <Navbar />
      <div>
        <Outlet />
      </div>
    </div>
  );
};

export default Layout;
Here we are using React Router's <Outlet /> component to render the child route components inside of the Layout component.
(Optional) Adding Route Protection
Currently, a user can visit the Home and Users page even if they are unauthenticated. Similarly, if a user is already authenticated, they can still visit the Login and Sign Up pages. To prevent that, let's add route protection:
Update the App.js code with this code:
import { useCallback, useEffect } from "react";
import {
  createBrowserRouter,
  RouterProvider,
  useLocation,
  Navigate,
} from "react-router-dom";
import PropTypes from "prop-types";
import axios from "axios";

import Signup from "./components/Signup/Signup";
import Login from "./components/Login/Login";
import Home from "./components/Home/Home";
import Users from "./components/Users/Users";
import Layout from "./components/Layout/Layout";
import SplashScreen from "./components/SplashScreen/SplashScreen";

import { useAuth } from "./contexts/auth-context";
import { STATUS } from "./utils/utils";

function App() {
  const { login, logout, isAuthenticated, expiresAt } = useAuth();

  const refreshAccessToken = useCallback(async () => {
    try {
      const response = await axios.post(
        "/api/auth/refresh",
        {},
        {
          withCredentials: true,
        }
      );

      const { user, accessToken, expiresAt } = response.data;

      if (response.status === 204) {
        logout();
      } else {
        login(user, accessToken, expiresAt);
      }
    } catch (error) {
      logout();
    }
  }, [login, logout]);

  useEffect(() => {
    refreshAccessToken();
  }, [refreshAccessToken]);

  useEffect(() => {
    let refreshAccessTokenTimerId;

    if (isAuthenticated) {
      refreshAccessTokenTimerId = setTimeout(() => {
        refreshAccessToken();
      }, new Date(expiresAt).getTime() - Date.now() - 10 * 1000);
    }

    return () => {
      if (isAuthenticated && refreshAccessTokenTimerId) {
        clearTimeout(refreshAccessTokenTimerId);
      }
    };
  }, [expiresAt, isAuthenticated, refreshAccessToken]);

// New code
  const router = createBrowserRouter([
    {
      element: <Layout />,
      children: [
        {
          path: "/",
          element: (
            <RequireAuth redirectTo="/sign-up">
              <Home />
            </RequireAuth>
          ),
        },
        {
          path: "sign-up",
          element: (
            <RedirectIfLoggedIn redirectTo="/">
              <Signup />
            </RedirectIfLoggedIn>
          ),
        },
        {
          path: "login",
          element: (
            <RedirectIfLoggedIn redirectTo="/">
              <Login />
            </RedirectIfLoggedIn>
          ),
        },
        {
          path: "users",
          element: (
            <RequireAuth redirectTo="/sign-up">
              <Users />
            </RequireAuth>
          ),
        }
      ],
    },
  ]);

  return (
    <div className="App">
      <RouterProvider router={router} />
    </div>
  );
}

// New code
const RequireAuth = ({ children, redirectTo }) => {
  const { isAuthenticated, status } = useAuth();
  const location = useLocation();

  if (status === STATUS.PENDING) return <SplashScreen />;

  return isAuthenticated ? (
    children
  ) : (
    <Navigate to={redirectTo} state={{ from: location }} />
  );
};

// New code
const RedirectIfLoggedIn = ({ children, redirectTo }) => {
  const { isAuthenticated, status } = useAuth();
  const location = useLocation();

  if (status === STATUS.PENDING) return <SplashScreen />;

  return isAuthenticated ? (
    <Navigate to={location.state?.from?.pathname || redirectTo} />
  ) : (
    children
  );
};

RequireAuth.propTypes = {
  children: PropTypes.element.isRequired,
  redirectTo: PropTypes.string.isRequired,
};

RedirectIfLoggedIn.propTypes = {
  children: PropTypes.element.isRequired,
  redirectTo: PropTypes.string.isRequired,
};

export default App;
We have added two new components to the App.js file 1. <RequireAuth /> and 2. <RedirectIfLoggedIn /> component. The RequireAuth component is used to protect routes that only an authenticated user can visit, while the RedirectIfLoggedIn component is used to hide routes like sign-up and login which an authenticated user cannot visit.
RequireAuth Component:
This component takes in two props: children and redirectTo. The redirectTo prop specifies the path to which an unauthenticated user should be redirected. It relies on the isAuthenticated and status properties returned by the useAuth hook to determine the user's authentication status.
If the user is unauthenticated, the component redirects them to the path specified in the redirectTo prop. On the other hand, if the user is authenticated, the component renders the child components passed through the children prop. If the authentication status is pending, the component displays the SplashScreen component.
RedirectIfLoggedIn Component:
This component also takes in two props: children and redirectTo. The redirectTo prop specifies the path to which an authenticated user should be redirected. It relies on the isAuthenticated and status properties returned by the useAuth hook to determine the user's authentication status.
If the user is authenticated, the component redirects them to the path specified in the redirectTo prop. On the other hand, if the user is unauthenticated, the component renders the child components passed through the children prop. If the authentication status is pending, the component displays the SplashScreen component.
SplashScreen Component:
Add this code inside the SplashScreen.js file under the src/components/SplashScreen directory.
import styles from './SplashScreen.module.scss';

const SplashScreen = () => {
  return (
    <div className={styles.container}>
      <div className={styles.iconContainer}>
        <div>
            ...loading
        </div>
      </div>
    </div>
  );
};

export default SplashScreen;
SplashScreen.module.scss
Add this code inside the SplashScreen.module.scss file under the src/components/SplashScreen directory.
.container {
    background-color: #fff;
    color: teal;
    position: fixed;
    top: 0;
    left: 0;
    height: 100%;
    width: 100%;
    z-index: 999;
}

.iconContainer {
    position: absolute;
    top: 50%;
    left: 50%;
    translate: (-50%, -50%);
    color: teal;
}
Final Result
Source Code
You can download the source code from my GitHub repo:
Conclusion
So we have learned how to implement refresh and access token-based authentication in React and NodeJS. We have learned the difference between access and refresh tokens, and how to perform silent authentication by refreshing access tokens in the background. We have also learned how to protect routes in React applications using React Router.
That’s it and hope you found this article helpful! Please feel free to comment below and ask anything, suggest feedback or just chat. You can also follow me on Hashnode, Medium and Twitter. Cheers! ⭐️