Understanding Sass: CSS Made Awesome
Everything you should know about Sass

Web Developer. Tech Writer. Loves poetry, philosophy and programming. Writes at: https://medium.com/@sukhjinder and https://whatisweb.dev. Find me @ https://sukhjinderarora.com/
This article was originally published at: https://blog.bitsrc.io/the-complete-beginners-guide-to-sass-ee8d5278f4c
While CSS is getting more powerful day by day, it still lacks certain features (such as code reuse) that make it harder to maintain when the projects get bigger and more complex.
There are many CSS methodologies (such as OOCSS, and SMACSS) that help us write more maintainable CSS code, but these methodologies alone aren’t enough to solve the problem of maintaining large CSS codebases.
That’s where Sass comes into play. Sass provides us with features and tools that regular CSS doesn’t have, using Sass we can write more readable, maintainable, and reusable CSS code.
So in this article, I will dive into what Sass is, how to compile Sass code into regular CSS, and discuss features that make it so powerful.
So without further ado, let’s get started :)
What is Sass?
If you know CSS or if you are learning CSS, then you must have heard about Sass. Sass is a CSS preprocessor, a superset of CSS that adds features that aren’t available in regular CSS.
A CSS preprocessor is a language that extends CSS, adds features to CSS, and gets compiled into regular CSS. A CSS preprocessor helps developers to write cleaner and easier-to-understand CSS code.
Some well known CSS preprocessors are: SASS, LESS, and Stylus.
Sass or SCSS?
There are two syntaxes available for Sass. 1) SCSS and 2) Sass
- SCSS known as Sassy CSS is a newer and most-used version of Sass. It has a similar syntax to CSS because it’s a language extension or a superset of CSS. So a valid CSS is also a valid SCSS. Its file extension is
.scss. - Sass is an older syntax of Sass. It uses indentation rather than brackets. Its file extension is
.sass.
In this article, I will use the SCSS syntax of Sass.
Installing Sass
Browsers do not understand Sass, for browsers to understand the Sass code we write, we have to convert it into regular CSS code. We do this by running the Sass compiler which converts our Sass code to into regular CSS code.
Getting Started:
Before starting, you must have npm installed on your computer, which comes bundled with Node.js, you can install it from here.
Folder Structure:
Let’s first create the below folder in which we will install Sass.
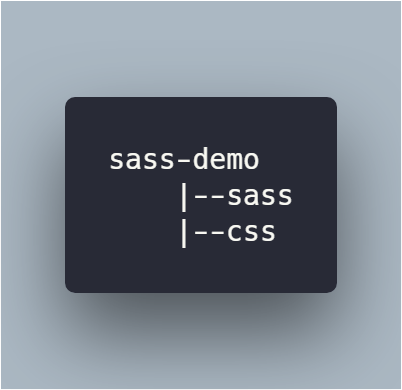
You can create the above directories with these commands.
mkdir sass-demo
cd sass-demo
mkdir -p sass css
Initialize the Project Directory:
All projects that use the node package manager(npm) must be initialized. To initialize the project enter the below command in a terminal. This will create a package.json file.
npm init -y
Installing sass
The sass package is the JavaScript implementation of the sass. This command will install sass as a dependency of our project.
npm install sass
Compiling Sass Code to CSS
Create an npm script to compile the Sass code into CSS code. Add this script inside the script section of the package.json file.
"compile-sass": "sass sass/main.scss css/style.css"
Here main.scss is our main Sass file, and style.css is the compiled CSS file.
We can also add a --watch flag. The watch flag tells the Sass compiler to watch your source files for changes, and re-compile CSS each time you save your Sass files. For example:
"compile-sass": "sass sass/main.scss css/style.css --watch"
Finally, we can compile our Sass code into CSS by running the below command in the terminal.
npm run compile-sass
Sass Features
Now that we know what Sass is, and how to install Sass, let’s dive into various features of Sass that make it so powerful.
1# Variables
Variables are one of the most useful features of Sass. Variables allow us to define certain values and reuse them across the code. Variables in Sass are similar to variables in JavaScript. In Sass, variables always start with a $.
For example:
$variable-name: variable-value;
Let’s take a look at the below HTML:
<div class="heading">
  <h1 class="heading-primary">This is a primary heading</h1>
  <h2 class="heading-secondary">This is a secondary heading</h2>
</div>
Let’s define two variables for primary and secondary colors:
$color-primary: #55c57a;
$color-secondary: #7ed56f;
Let’s style the above headings in Sass:
.heading-primary {
  color: $color-primary;
  text-align: center;
  margin-top: 10px;
}

.heading-secondary {
  color: $color-secondary;
  text-align: center;
  margin-top: 15px;
}
The above code will be compiled into below CSS code:
.heading-primary {
  color: #55c57a;
  text-align: center;
  margin-top: 10px;
}

.heading-secondary {
  color: #7ed56f;
  text-align: center;
  margin-top: 15px;
}
After compiling, the variables will be replaced by their actual values in CSS.
2# Nesting
Nesting is another useful feature of Sass. CSS doesn’t support selector nesting. Using nesting, we can nest child selectors inside the parent selector.
For example, consider the below HTML:
<nav class="navigation">
  <ul>
    <li>Home</li>
    <li>About</li>
    <li>Contact</li>
  </ul>
</nav>
Without Sass, we’d have to write the following CSS code:
.navigation {
  background-color: yellow;
  padding: 20px;
}

.navigation ul {
  list-style: none;
}

.navigation li {
  text-align: center;
  margin-top: 20px;
}
Notice that we have to repeat the navigation class name every time we want to style its children. With Sass, we can write cleaner and less repetitive code. For example:
.navigation {
  background-color: yellow;
  padding: 20px;

  ul {
    list-style: none;
  }

  li {
    text-align: center;
    margin-top: 20px;
  }
}
3# Mixins
Mixins are yet another powerful feature of Sass. Using mixins, we can reduce code redundancy and increase code reuse. A mixin is a reusable piece of code that is similar to functions. For example, we can define a mixin as follows:
@mixin mixin_name() {
  /* code */
}
Let’s take a look at the below HTML:
<div class="box">
  <div>
  </div>
</div>
Sass code:
.box {
  background-color: red;
  width: 100%;
  height: 100vh;
  position: relative;

  div {
    width: 200px;
    height: 200px;
    background-color: blue;
    position: absolute;
    top: 50%;
    left: 50%;
    transform: translate(-50%, -50%);
  }
}
Here we are positioning the inner div at the center of the outer div. We can place the code inside a mixin called absCenterPosition. For example:
@mixin absCenterPosition() {
  position: absolute;
  top: 50%;
  left: 50%;
  transform: translate(-50%, -50%);
}
We can include the above mixin in our code by using the @include directive, for example:
.box {
  background-color: red;
  width: 100%;
  height: 100vh;
  position: relative;

  div {
    width: 200px;
    height: 200px;
    background-color: blue;
    @include absCenterPosition;
  }
}
We can also pass arguments to the mixins. For example:
@mixin box-shadow($x, $y, $blur, $spread) {
  -webkit-box-shadow: $x $y $blur $spread;
  -moz-box-shadow: $x $y $blur $spread;
  -ms-box-shadow: $x $y $blur $spread;
  box-shadow: $x $y $blur $spread;
}
We can include the mixin as:
.box {
  background-color: red;
  width: 100%;
  height: 100vh;
  position: relative;

  div {
    width: 200px;
    height: 200px;
    background-color: blue;
    @include absCenterPosition;
    @include box-shadow(0, 5px, 5px, rgba(0, 0, 0, 0.7));
  }
}
4# Functions
Functions in Sass are similar to functions in JavaScript. Just like JavaScript, functions in Sass can accept arguments and return some value. For example:
@function divide($a, $b) {
  @return $a / $b;
}

div {
  margin: divide(60, 2) \* 1px;
  height: 200px;
  width: 200px;
}
5# Partials and Import
Partials in Sass are separate files containing Sass code that make our code modular. Using partials, we can have separate Sass files for different components.
A partial’s name always starts with an underscore(_). We use an @import directive to import partial into another Sass file. For example, we can import the _header.scss file into main.scss file.
// main.scss
@import 'header';
When importing a partial, we can omit the underscore(*_*) and *.scss* file extension.
Unlike CSS imports, Sass imports don’t send another HTTP request for fetching the partial, because during compiling all the imports are placed in a single CSS file.
#7 Inheritance/Extend
In Sass, we can extend CSS properties from one selector to another. For this, we use the @extend directive.
Generally, for the inheritance we use placeholder classes that start with a %, the advantage of using placeholder classes is that they only print in compiled CSS when it is extended and can help keep your compiled CSS neat and clean.
For example:
%panel {
  background-color: blue;
  border: 2px solid red;
}

.small-panel {
  @extend %panel;
  width: 70px;
  height: 70px;
}

.big-panel {
  @extend %panel;
  width: 200px;
  height: 200px;
}
This will be compiled into the following CSS.
.small-panel,
.big-panel {
  background-color: blue;
  border: 2px solid red;
}

.small-panel {
  width: 70px;
  height: 70px;
}

.big-panel {
  width: 200px;
  height: 200px;
}
6# Ampersand (&) operator
The ampersand (&) operator is another useful feature of Sass. This operator is particularly useful when you are using BEM methodology.
Let’s take a look at the below HTML:
<button class="btn btn--green">Hello World</button>
If we have to style it without the & operator, we’d do something like this:
.btn {
  display: inline-block;
  padding: 5px 8px;
}

.btn--green {
  background-color: green;
}

.btn:hover {
  background-color: transparent;
}
But using the & operator we can do it like this:
.btn {
  display: inline-block;
  padding: 5px 8px;

  &--green {
    background-color: green;
  }

  &:hover {
    background-color: transparent;
  }
}
So using the & operator, we can nest selectors that share the same name, and during compile time the & operator will be replaced by its enclosing selector name.
5# Directives
There are many directives in Sass. For example, @extend, @mixin, and @import are some of the directives that we have seen above. There are many more directives in Sass, such as @if, @else, @for, and @while.
@if and @else directives
The @if and @else directives are similar to if and else statements in JavaScript. For example:
@mixin text-color($val) {
  @if $val == error {
    color: red;
  }
  @else if $val == warning {
    color: yellow;
  }
  @else if $val == success {
    color: green;
  }
  @else {
    color: black
  }
}

.heading {
  @include text-color(error);
}
Here, we are using a mixin text-color which accepts an argument $val. We can have a different color for the heading depending on the value passed to the mixin.
@for and @while directive
The @for and @while directives are similar to for and while loops in JavaScript. For example:
@for $i from 1 through 4{
  .col-#{$i} {
     width: 100% / $i;
  }
}
We use #{} to use variables inside a selector name and other CSS functions. This will be compiled into the following CSS.
.col-1 {
  width: 100%;
}

.col-2 {
  width: 50%;
}

.col-3 {
  width: 33.33333%;
}

.col-4 {
  width: 25%;
}
We can also implement the above code using the @while directive. For example:
$i: 1;
@while $i < 5 {
  .col-#{$i} {
     width: 100% / $i;
  }
  $i: $i + 1;
}
This will be compiled into the following CSS:
.col-1 {
  width: 100%;
}

.col-2 {
  width: 50%;
}

.col-3 {
  width: 33.33333%;
}

.col-4 {
  width: 25%;
}
Conclusion
We have learned what Sass is, how to install it locally, and discussed the features that make it so powerful. Sass adds basic programming capabilities to CSS. Using Sass, we can perform basic calculations, reuse code using mixins, and create functions. Sass makes maintenance of CSS so much easier in bigger projects.
That’s it and if you found this article helpful, please click the like 😀 button, you can also follow me on Hashnode, Medium and Twitter, and if you have any doubt, feel free to comment! I’d be happy to help :)